

There is a lot of cool gear in the golf equipment world that doesn’t always fit neatly into Most Wanted Tests or Buyer’s Guides. You still want to know how it performs. In our We Tried It series, we put gear to the test and let you know if it works as advertised.
What We Tried
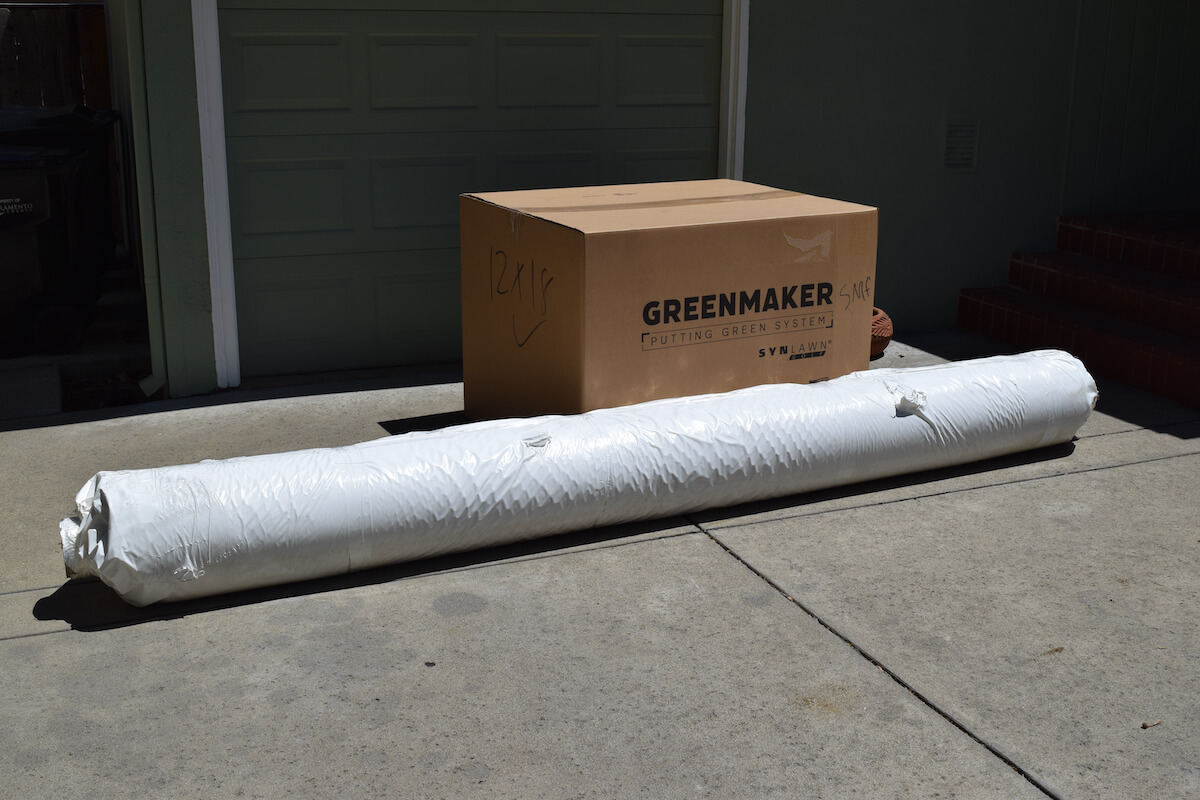
SYNLawn Dave Pelz GreenMaker Putting Green
Who Tried It?
Dave Wolfe – The ever-curious MyGolfSpy writer and putter fanatic. When it comes to golf products, I believe impulse control is something to be controlled.
Adding a SYNLawn GreenMaker Putting Green to My Backyard
We all have our golf bucket lists. Maybe you want to play Pebble Beach, break 80 or even achieve those goals simultaneously. Those two things are on my list as well. Additionally, I have longed to build a putting green in my backyard.
Some impediments were time related; some were fiscal. It’s tough to dip into the family coffers when your daughter needs braces. For some reason, I am the only one in the family who views straight putts equally as important as straight teeth.
Truth be told, the process of building a green was also quite intimidating. Spend a few minutes on YouTube searching DIY putting greens and you will agree. Almost immediately, I realized I lacked the required depth of knowledge about road base compaction and carpet seam construction. In no way was I comfortable spending the money on materials, only to have my incomplete construction skills doom the project.
SYNLawn GreenMaker Putting Greens
Obviously, an all-in-one putting green kit seemed the logical choice. That is where the SYNLawn GreenMaker green entered the picture.
SYNLawn and I had an odd introduction.
This project began with an advertising email that SYNLawn Golf sent out for Father’s Day. I don’t believe I had heard of SYNLawn prior to that. This is an odd revelation since SYNLawn is the golf branch of Astroturf, the OG of synthetic turf companies. Astroturf was a name I knew.
Curiosity piqued, I clicked the advertising email (questionable choice, I know, I know) to see if SYNLawn had a backyard putting green solution. They did and there was another famous name associated with the green: Dave Pelz.
Dave Pelz and SYNLawn Partnership
Now that’s a pair of big-name players. Seemed like a natural pairing for a successful putting green collaboration. I had to check it out.
What I found on the SYNLawn website was a whole bunch of cool custom putting green builds. Follow this LINK to see them. Some of these custom putting green builds are spectacular. I love the way the greens can be customized to fit various spaces.
For many of us, this kind of installation is beyond our budget. Thankfully, SYNLawn had options.
After a simple tool-free assembly, you are ready to enjoy your very own putting green in the privacy of your home or office. SYNLawn website
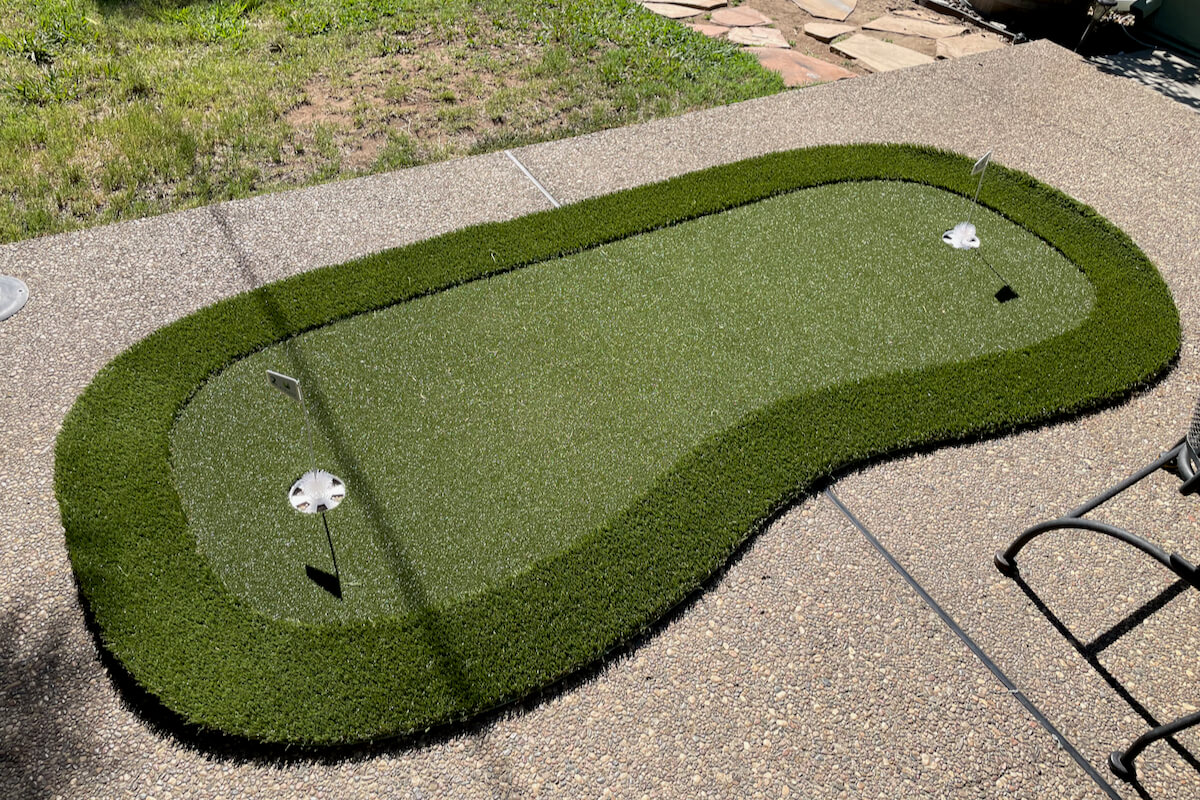
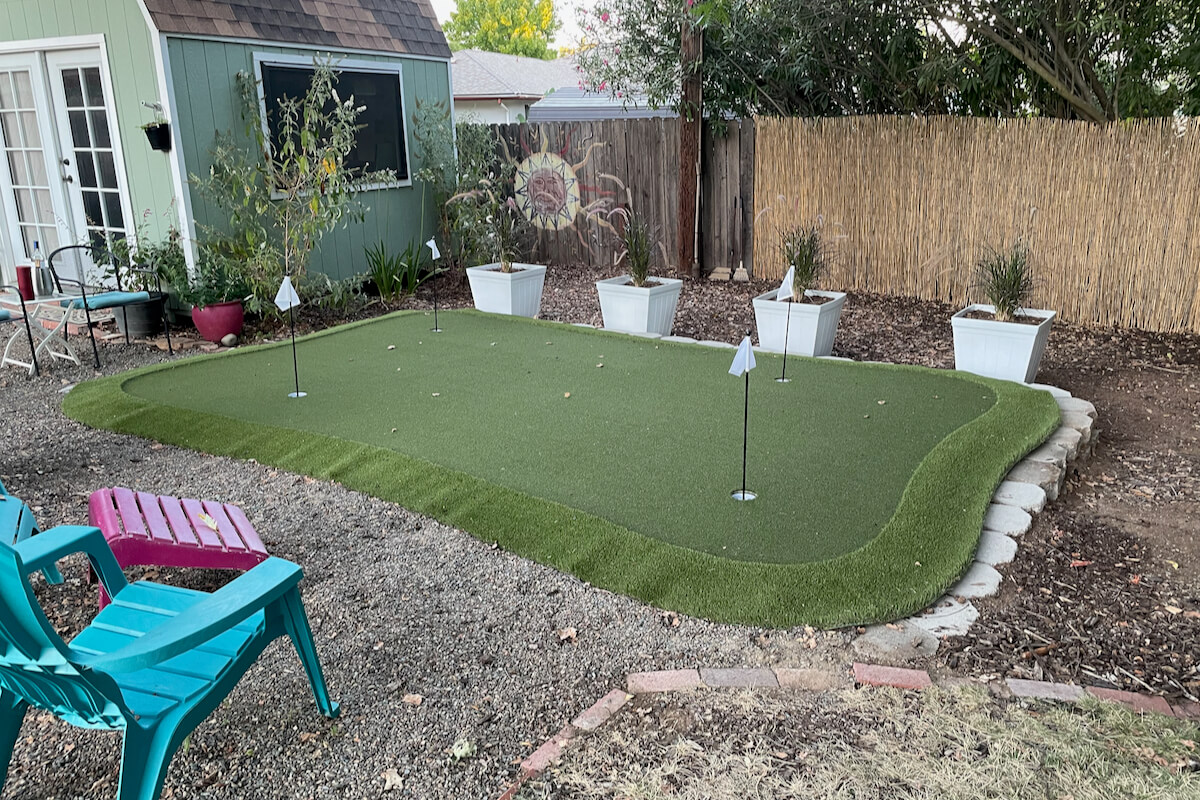
The GreenMaker seemed to be the perfect DIY putting green system. Modular base, single piece of turf, and “simple tool-free assembly”? Yes, please. The nylon synthetic bentgrass turf can survive the hot summers and the mild, dry winters here in Northern California. Some quick measuring revealed that the 18×12-foot green would fit nicely along my back fence.
Finally, the backyard putting green was going to happen.
Building the SYNLawn GreenMaker Putting Green: Time Lapse
The video above shows the whole SYNLawn GreenMaker Putting Green installation process from prep to putts. Start to finish in only five minutes! . Obviously, that video is sped up a touch. In reality, the installation took a few hours, spread over a few days, with 90 percent of that time being spent preparing the ground for the green.
Here is how it all went down.
Building the SYNLawn GreenMaker Putting Green: Preparing the Area
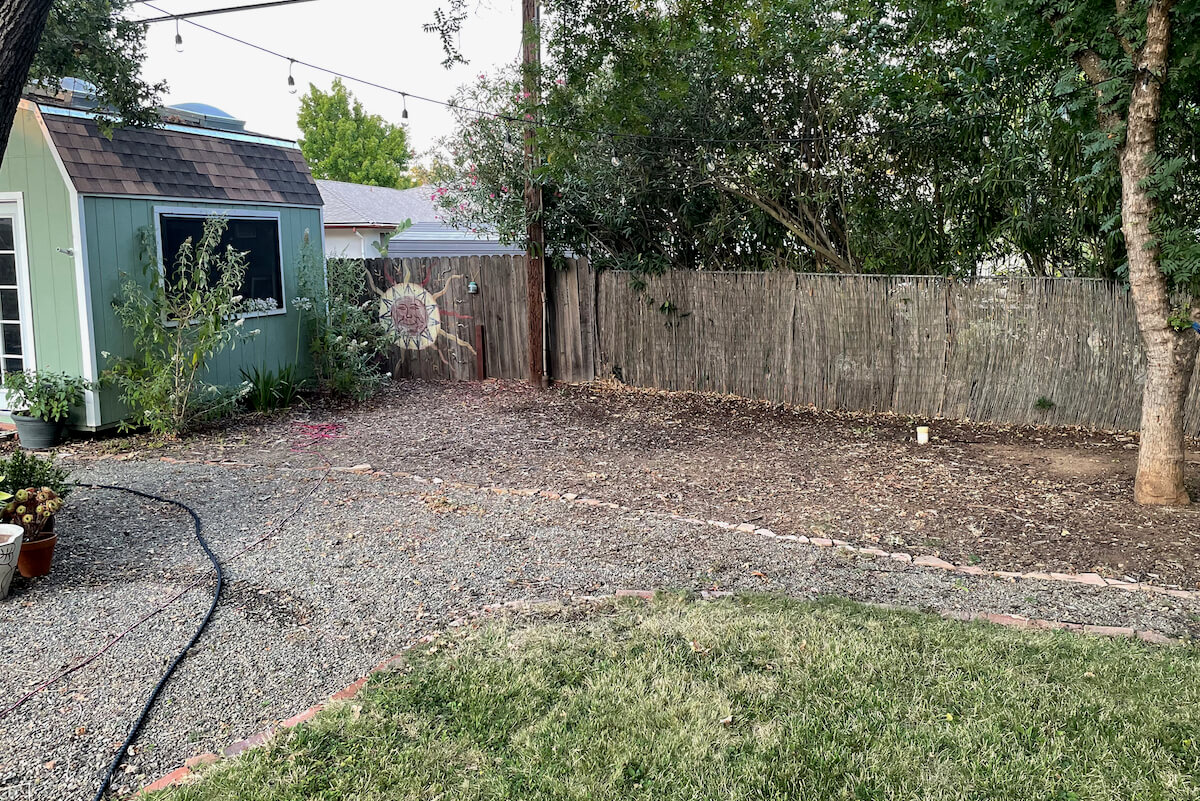
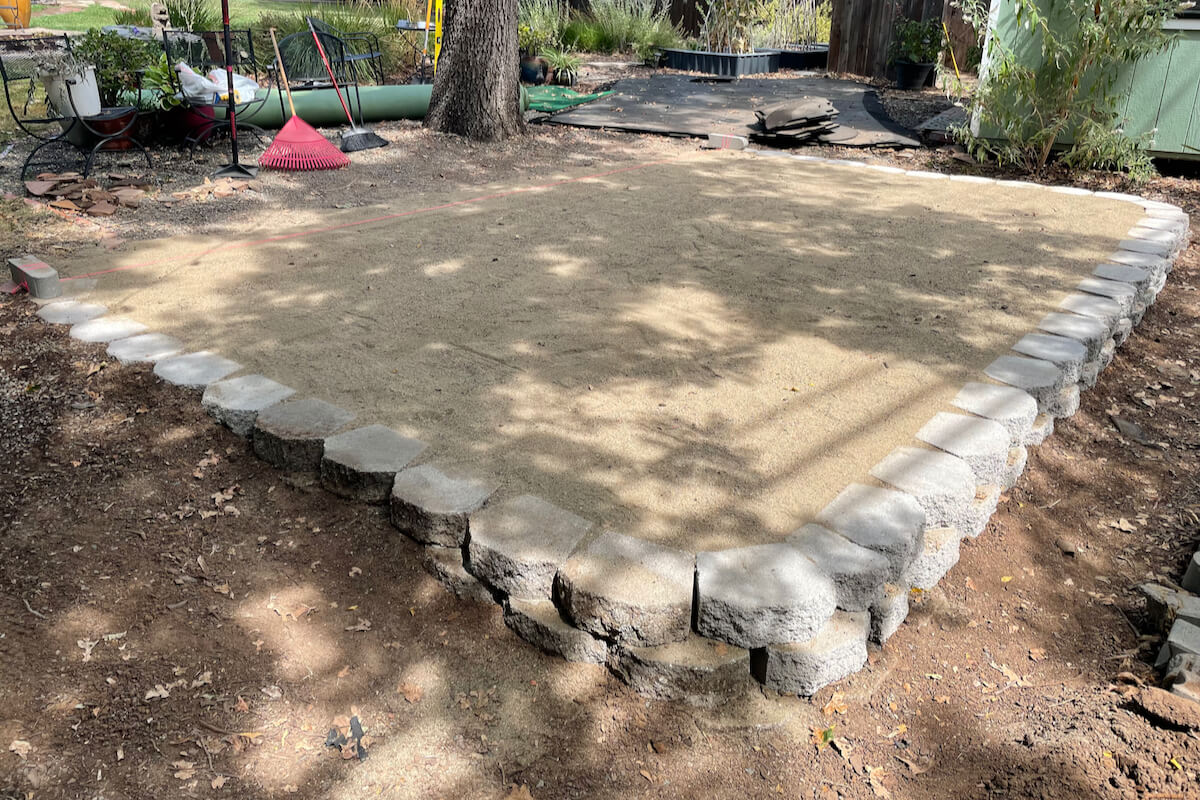
As I mentioned, I knew exactly where I wanted the green. My wife and I measured the perimeter, marking the corners with flags. Using a string and a level, it looked like there were about four inches of slope that I would need to account for in order to make the putting green level.
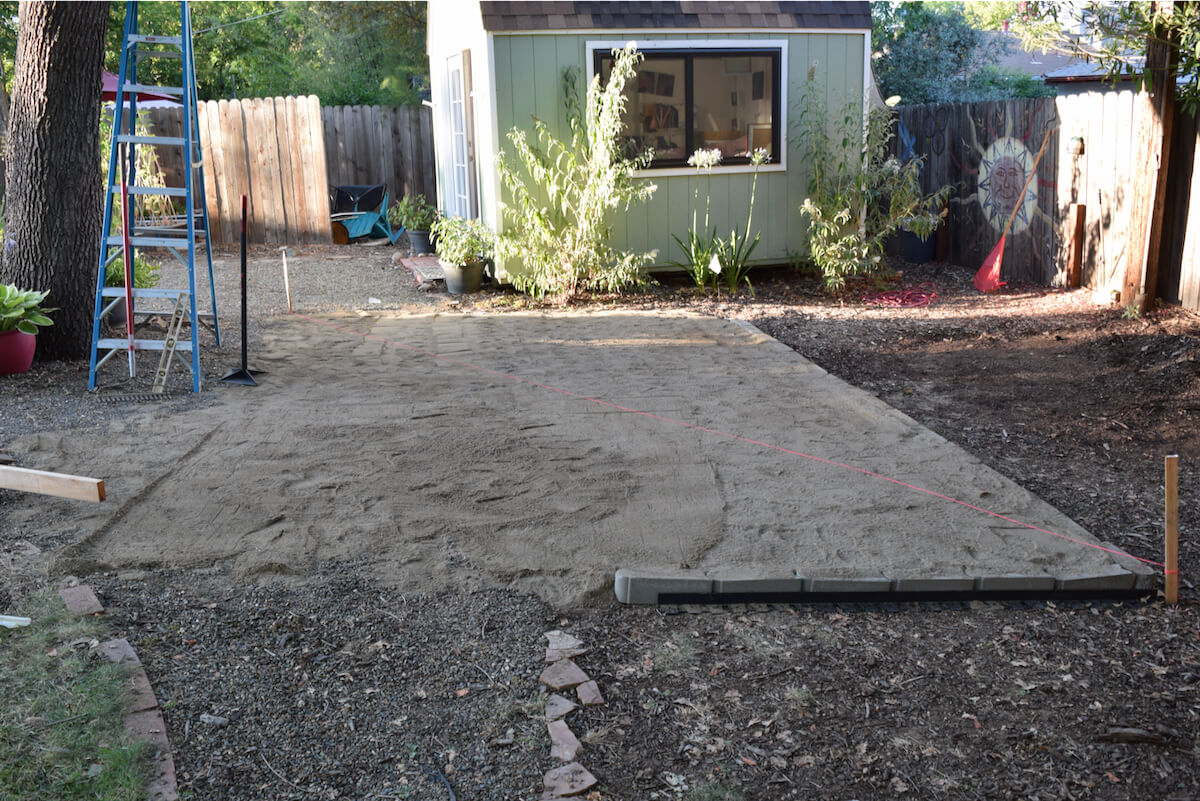
Not a problem, as I had some bricks from another project that I could use to build the short wall that would hold back the leveling sand. The 18×12-foot area and a depth of around four inches calculated out to about four cubic yards of leveling sand. That seemed like a lot but not outlandish for a green this size. Gotta trust the calculator, right?
Leveling the base was my main point of order. I ran level strings from corner to corner. These strings became the guide for how much sand to add. After a long afternoon of wheeling, tamping and screeding with a board, I had the level base. It was time to open up the GreenMaker box.
Building the SYNLawn GreenMaker Putting Green: Assembling the Base
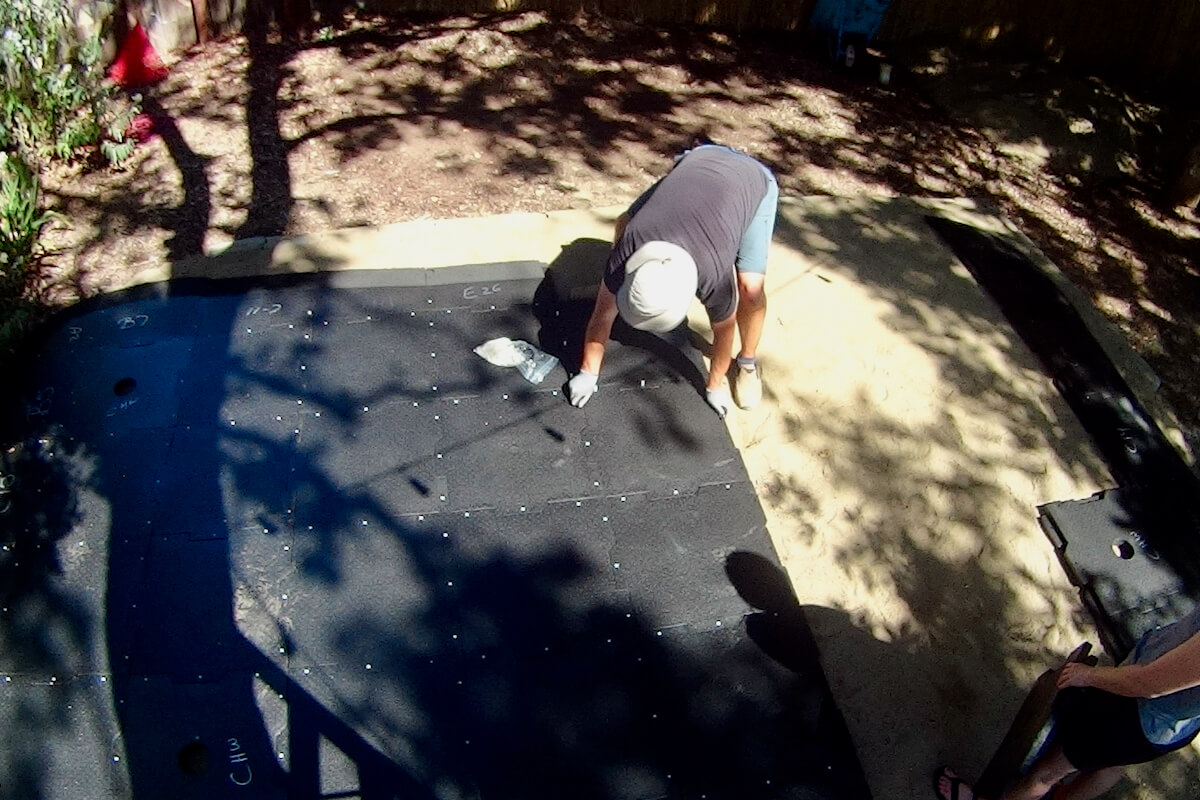
The GreenMaker base assembly was indeed tool-free. The foam base panels are made of Berrasof, a proprietary foam compound produced by SYNLawn. The Berrasof is firm like packaging foam but more flexible and definitely stronger. As I mention in the video, the tiles are all numbered and SYNLawn provides you with an easy-to-follow tiling plan. Initially, I deviated from said plan, thinking that I would build the edges first like I do with jigsaw puzzles.
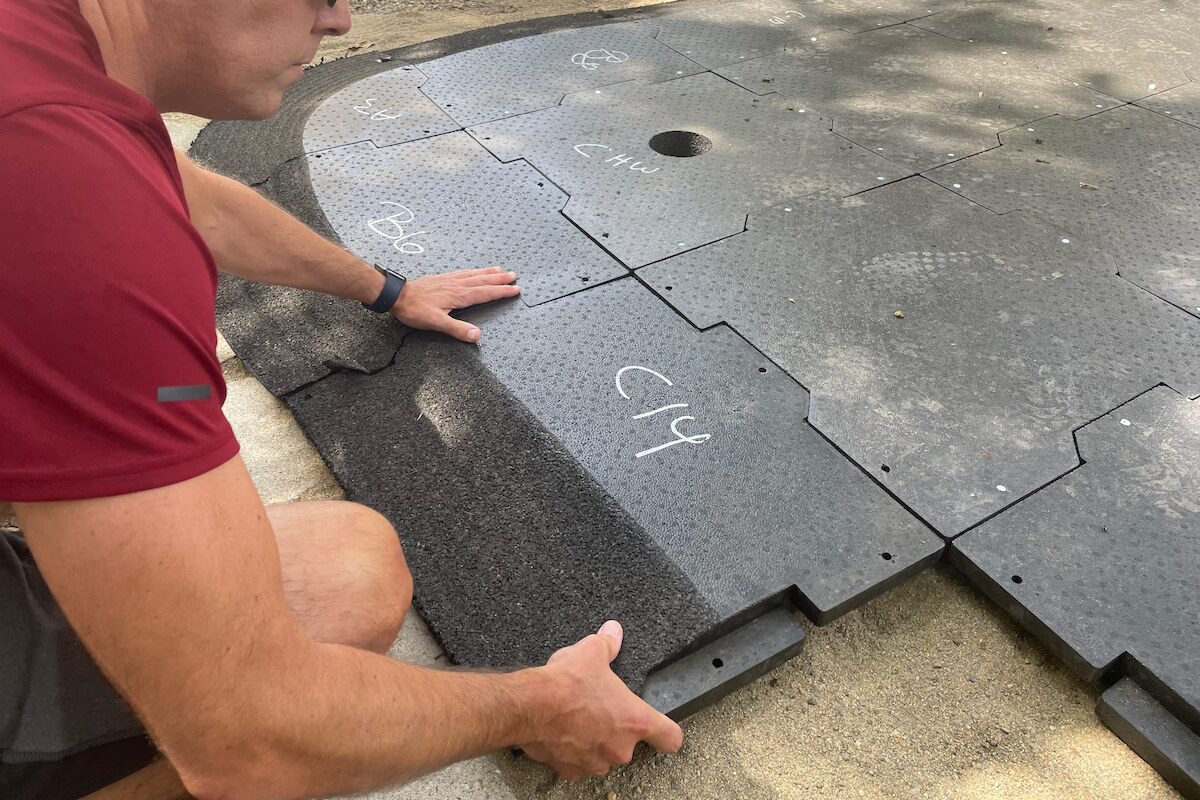
After getting stuck—and rereading the directions—I learned the tiles are intended to be assembled in one direction. That’s the way the grooves are angled. Once I got out of my own way, assembly was simple. The tongue and groove sections of the foam tiles fit together snuggly. Small pins then secure the attachment sites. Including my false start, the whole process was simple and took about 30 minutes.

At this point, I rolled a few balls across the base to check the slopes. A few areas were too steep but a quick lift of the base and a few shovels of sand corrected that quickly.
GET FIT FOR YOUR GAME WITH TRUEGOLFFIT™
Unbiased. No Guesswork. All Major Brands. Matched To Your Swing. Advanced Golf Analytics matches the perfect clubs to your exact swing using connected data and machine learning.
Building the SYNLawn GreenMaker Putting Green: Rolling Out the Turf

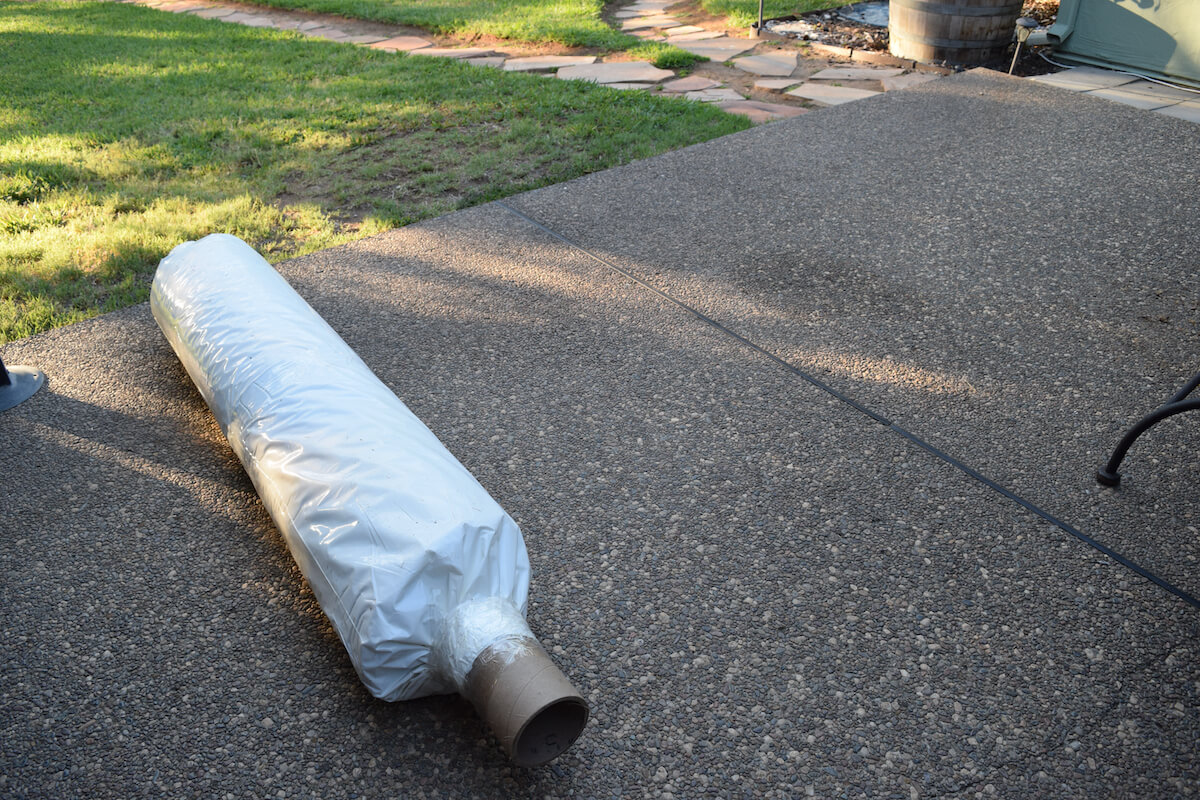
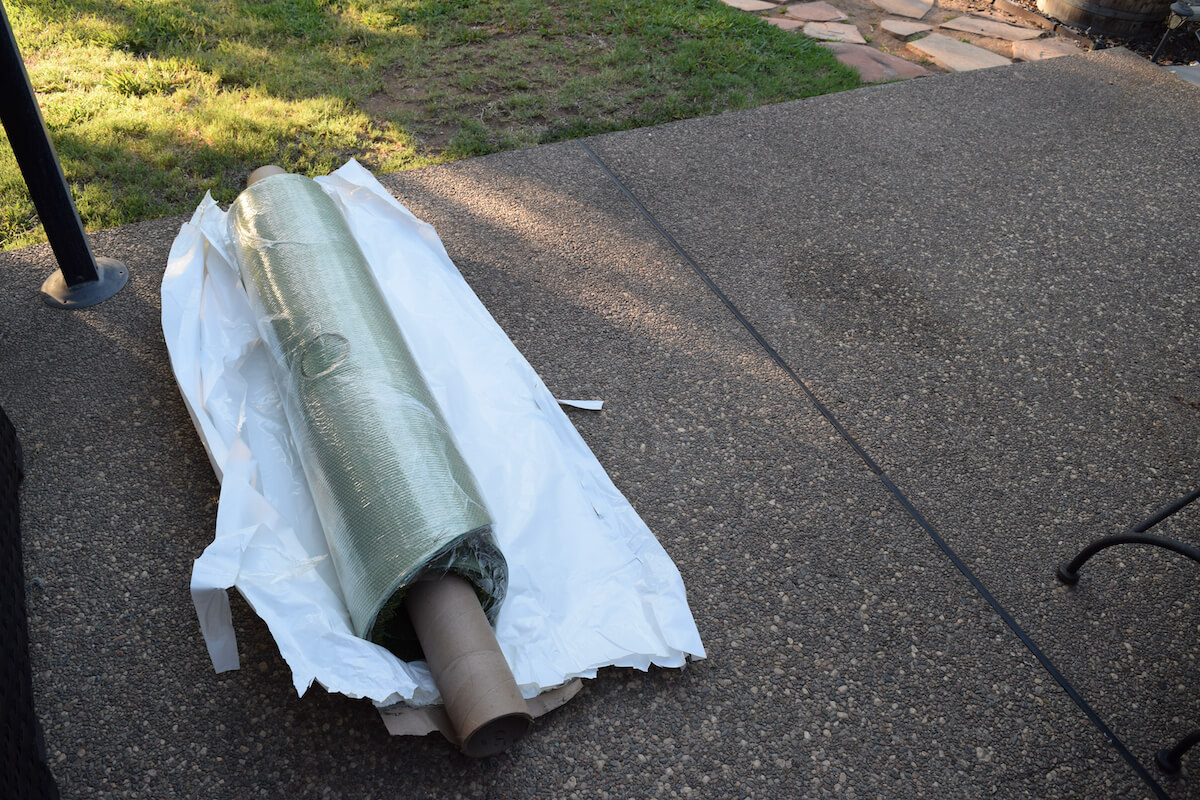
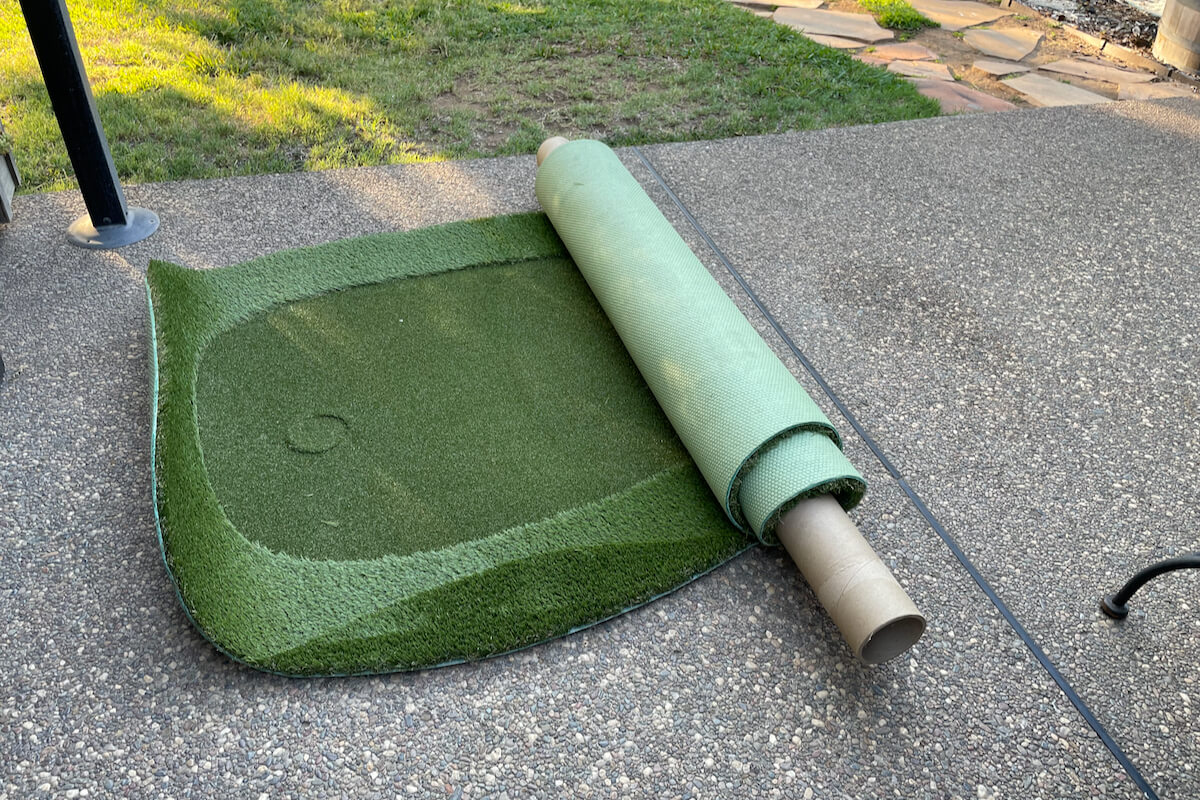
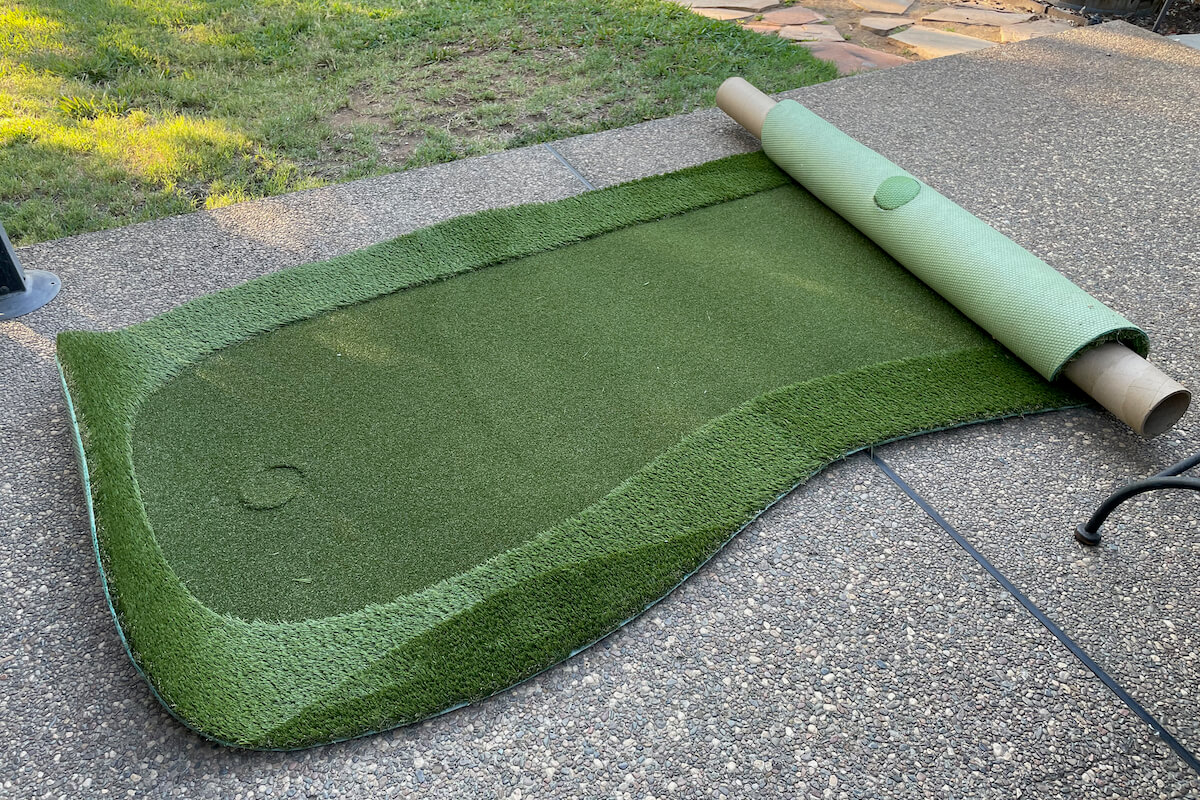
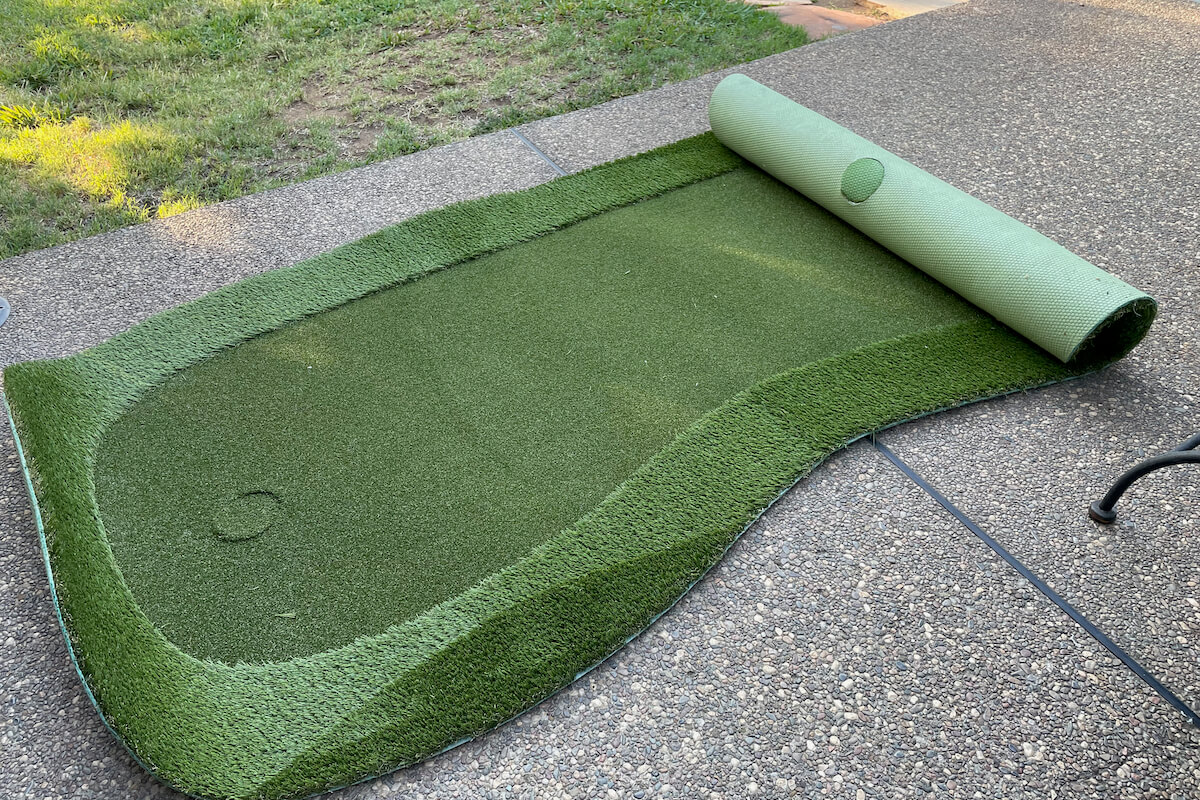
Although the near 200-pound roll of turf was a beast to carry to the work site, it was a breeze to install. As I mentioned, in no way was I interested in seaming together multiple sections of turf. Professionals can make carpet seams vanish but I am no professional. I had visions of a big ridge down the center of the green.
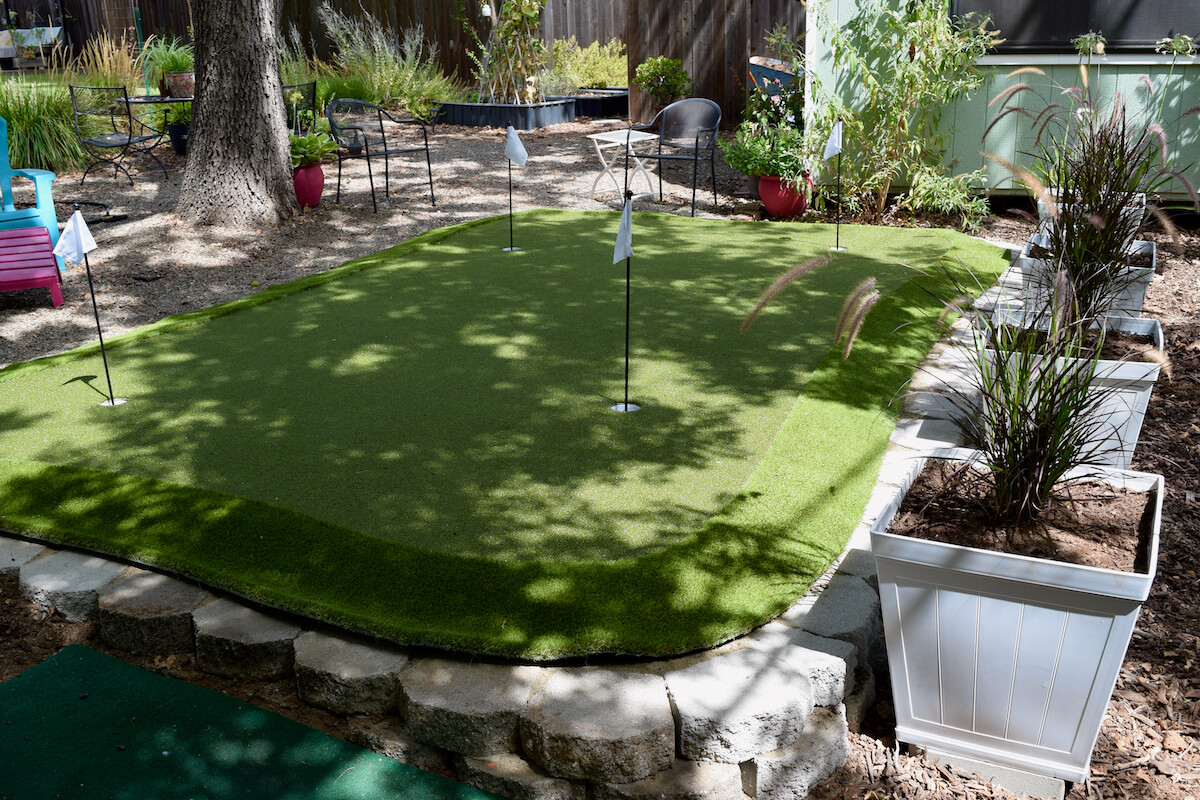
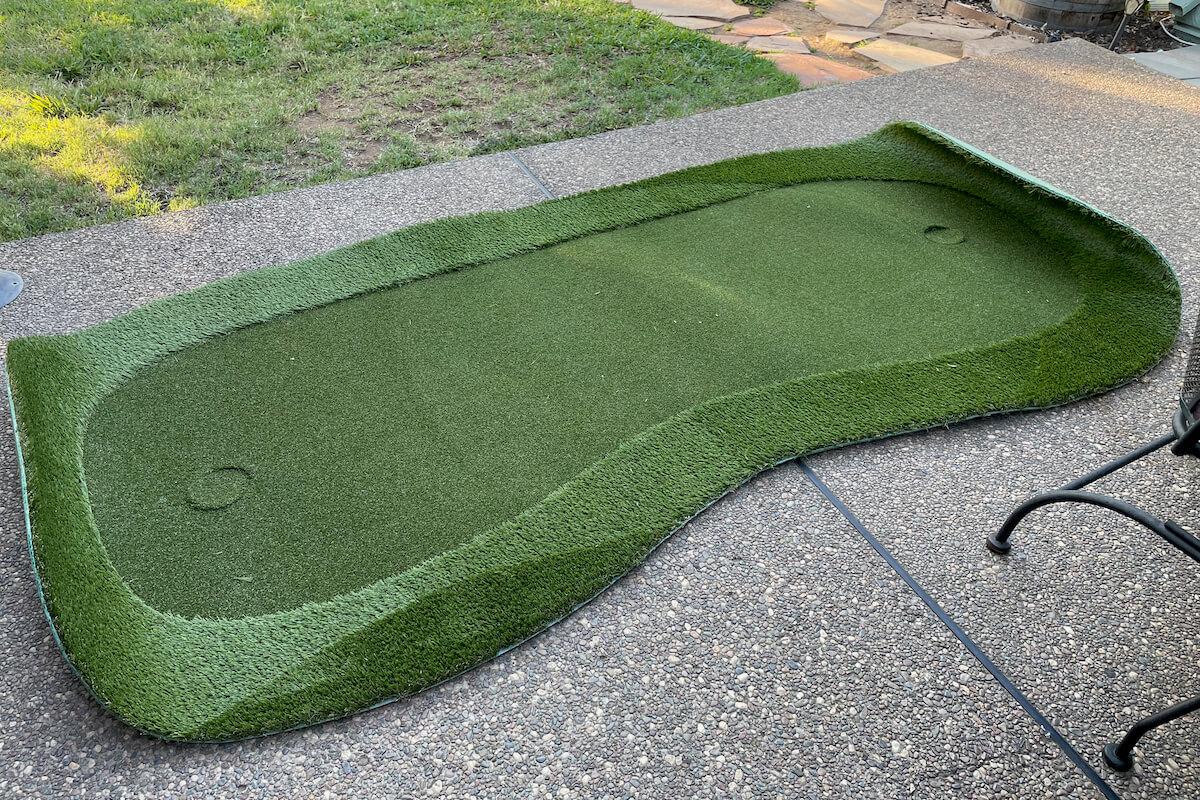
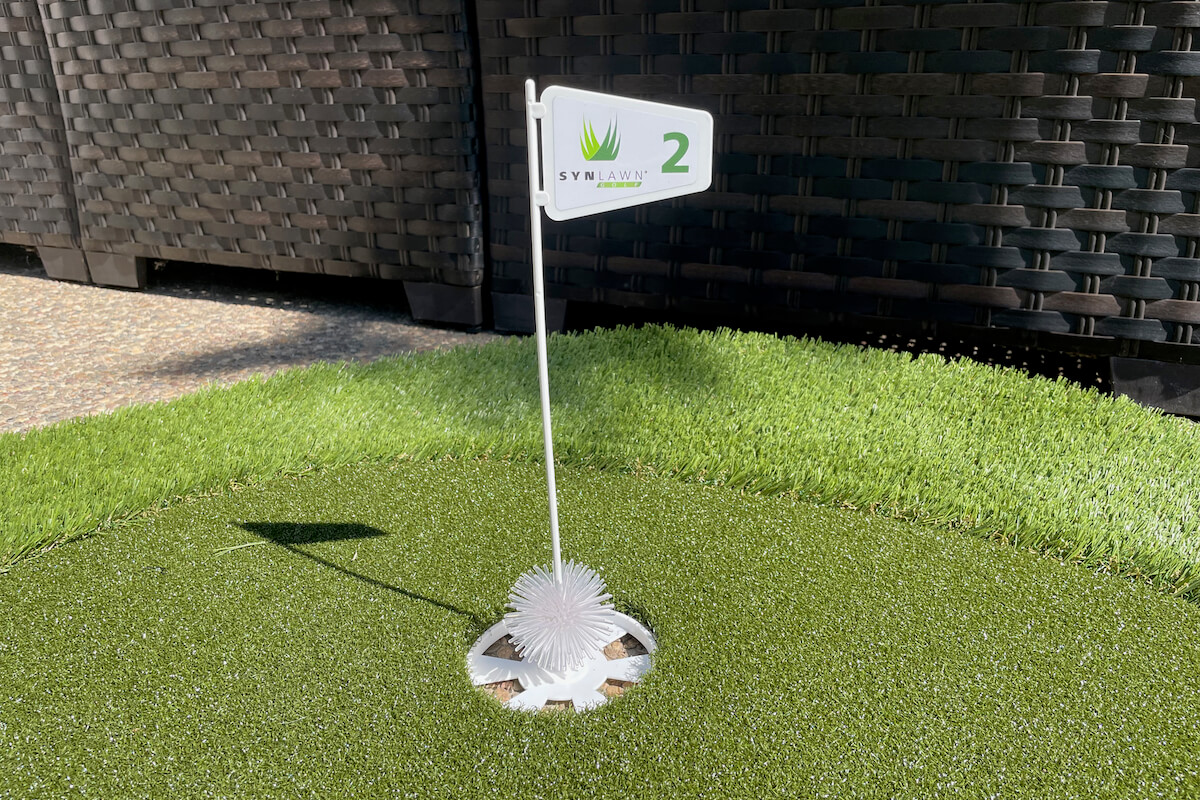
Thankfully, the GreenMaker Putting Green turf is all one big piece, fringe included. All you need do to install it is to start at one end and then roll it across the foam base tiles. Make sure you line up the holes in the turf with those in the base, drop in the cups and you are ready to roll balls.
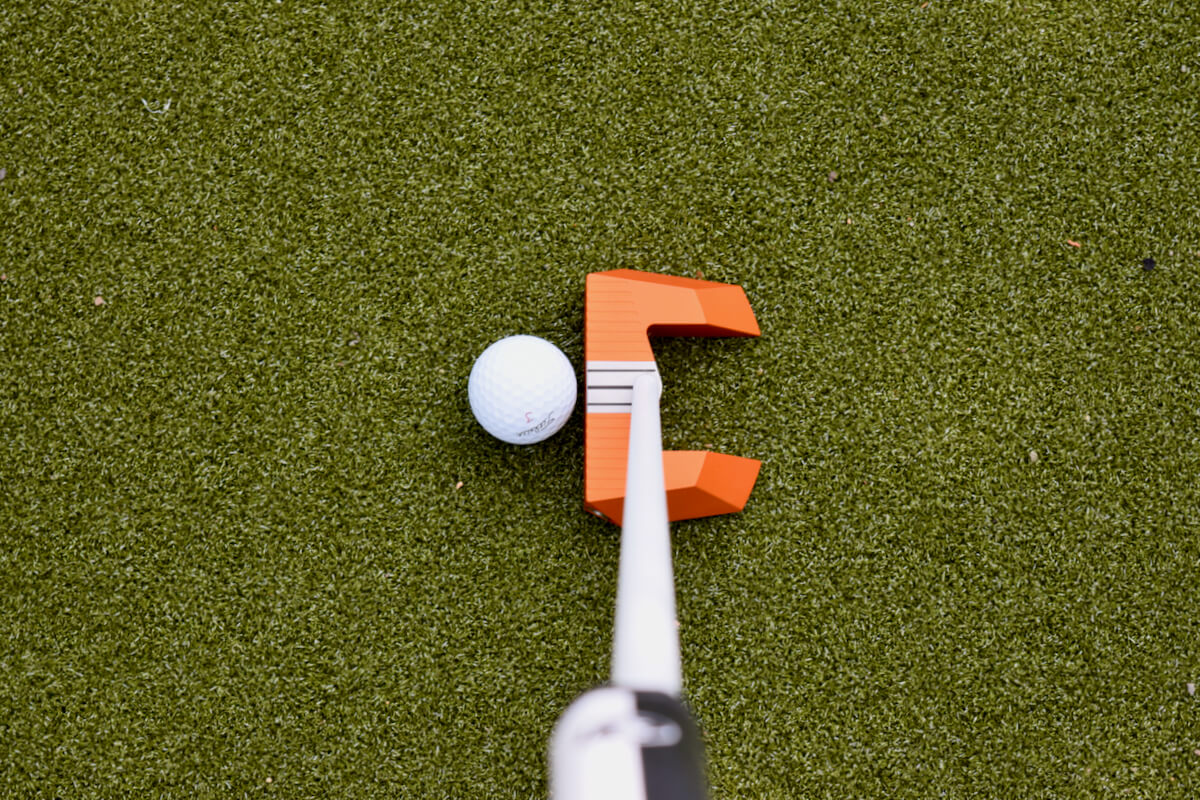
The turf is crazy uniform as you can see in the photo above. Maybe I should have expected this since it’s artificial but the uniform nature of the turf and the surrounding fringe made an impression on me. “Stout” would probably be the other descriptive term that quickly came to mind. This turf should last a while.
As advertised, the balls roll true. Not crazy fast and that’s fine by me. The speed is close to the greens I play on. Were it too fast or too slow, its value as a practice tool would decrease significantly.
I can’t overstate how easy building the GreenMaker Putting Green would have been on a concrete slab. Assemble the foam tiles, roll out the turf and you are done. Under an hour total for sure. SYNLawn has dialed in their design.
Building the SYNLawn GreenMaker Putting Green: Preparing the Area, Again


It would be great if the story ended in the paragraph above. Sadly, it has another chapter. While the SYNLawn side of the build story was extremely easy, my backyard didn’t share that easy directive.
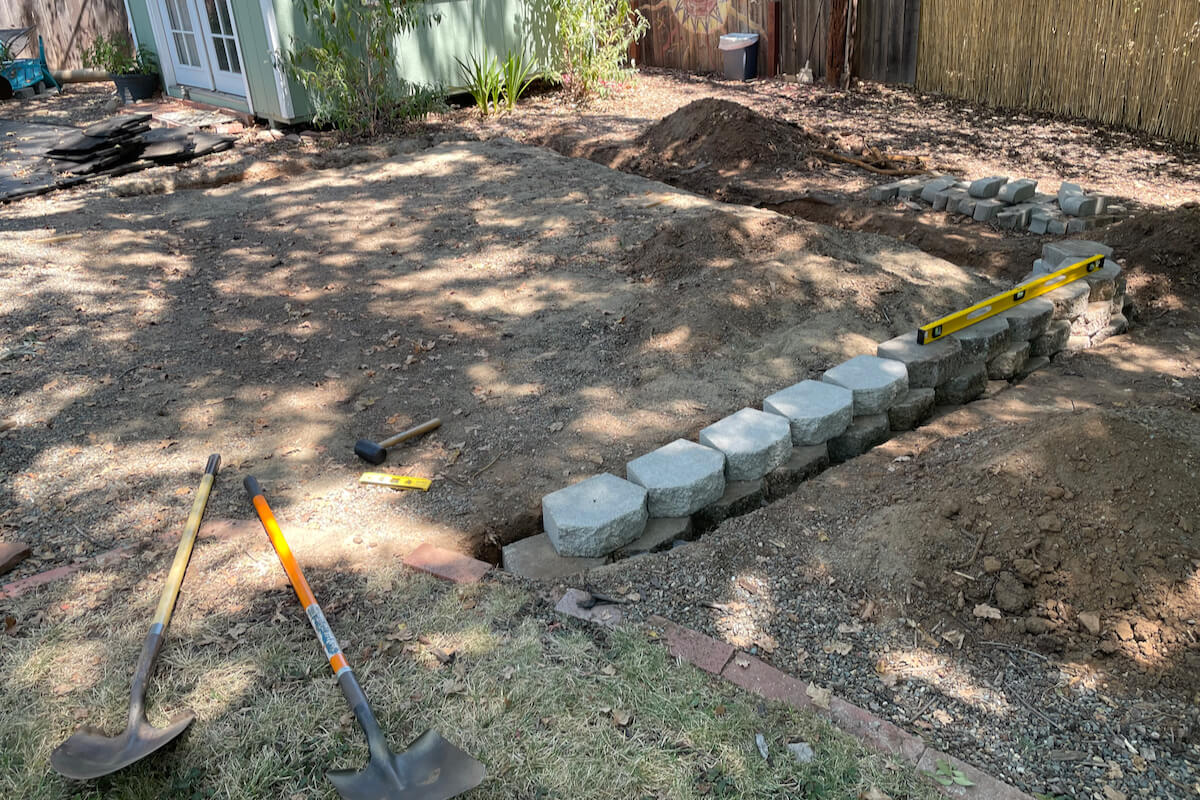
You see, when moving the mulch in the original installation area, I uncovered a previously unknown sewer cleanout. For some reason, it seemed a poor idea to put the putting green on top of this cleanout so we had to slide the green up the hill about four feet to sit above it.
Unfortunately, this changed our slope from about four inches to nearly a foot. As such, my initial sand retention system was not going to work.
As shown in the time lapse, I was able to get the green level with the short wall but I knew rebuilding the base was a necessity. If you were to look from the fence side, you would see the green resting on sand that was above the initial brick height. Obviously, this was not going to work in the long term.
And, so, I learned how to build a retaining wall. Thank you, YouTube. This turned out to be an endeavor. The GreenMaker base and turf only took an hour to build but the wall took about 12. Hardpan and roots were everywhere, naturally, and even buying the hundred or so wall blocks took three trips to Home Depot. At least it was only about 103F here in Sacramento those days. Big props to those of you who do this kind of work for a living.
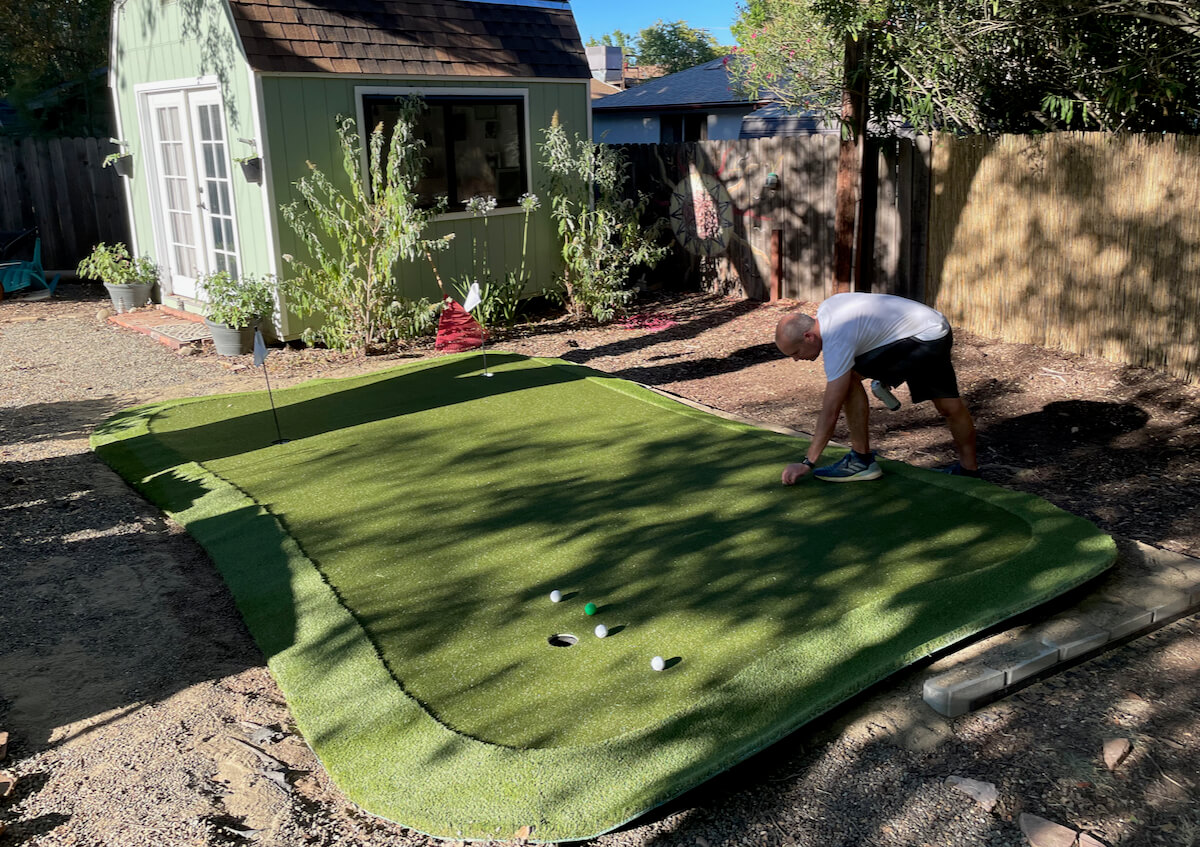
Eventually, my wall was built, level and able to contain the sand and rock needed to level the green. Once I slid the base back on the sand and rolled out the turf, the GreenMaker Putting Green became a permanent fixture of my backyard.
SYNLawn’s Putting Green Options


For this project, I installed the largest of the GreenMaker greens. But there are other options. This 12×18-foot green is also the most expensive at $5,299. The GreenMaker also comes 10×16 ($3,399), 8×14 ($2,599), and 6×12 ($1,599).
You can go even cheaper if you forego the modular base system. SYNLawn has five other small greens, priced from $169.99 to $679.99. The green shown in the photo above is the 6’x8′ green with fringe. Though smaller than the green I installed, the turf is of the same high quality. Installation was a breeze, requiring only a few books to take the curl out of the unrolled turf.
If you want to go in the other direction, SYNLawn contractors can build you an amazing one-of-a-kind putting green. They do corporate installations, too, if you have a rooftop that needs a bit of golf action.
Final Thoughts: SYNLawn Greenkeeper Putting Green
What is my overall take on the GreenMaker Putting Green experience? Honestly, it requires a bit of compartmentalization, separating the ground work from the putting green building.
As far as the ground preparation work, it was a lot more than I expected. That surprise cleanout turned a simple landscaping task into a huge one and mandated about $500 in additional materials. I’d say I have about 85-percent confidence in my wall build. I’ll feel better once it survives a storm or two. Should my wall fail, I will likely throw in the DIY towel and talk to a contractor about options.
At the other end of the spectrum, the SYNLawn GreenMaker Putting Green System is nails. It is so easy to assemble. The most difficult part was finding another person help me carry the turf and tiles to the build location.
If you build the GreenMaker on a level patio or concrete slab, I’ve no doubt that you can be rolling balls in under an hour. Just keep an eye out for those hidden cleanouts.
See all SYNLawn’s build options at: synlawngolf.com


Brian Parkinson
2 years ago
We have one of these indoors in our office. While i do like the roll, the consistency of the putts are awful. Put a couple of inches one direction or another and you’re getting completely different brakes. I don’t know if it’s the fault of the modular system or just the floor, but putting on it is very gimmicky. They also told our company to put in some undulations which makes it worse than a mini-golf putt putt and now half the holes are unplayable. I also have a room at home that I had my contractor just install a turf with 4 holes. The room is 13’x23′ and i had him install a 4″ brake over an 8′ area. Oh hindsight. I think just having a flat surface without undulations is the way to go.