


Materials? Check. Tools? Check. Measurements, geometry, and all requisite industry know-how? Check, check, and check.
Now that we’ve covered the basics around what a shaft is and how it’s designed, we have to actually construct the darn thing. It’s a meticulous process which isn’t exactly a paint-by-numbers kind of thing.
To offer a food analogy, everyone knows someone with a recipe that’s often imitated but never duplicated. The secret isn’t in the recipe itself as much as it is knowing when to add a dash of this or dollop of that.
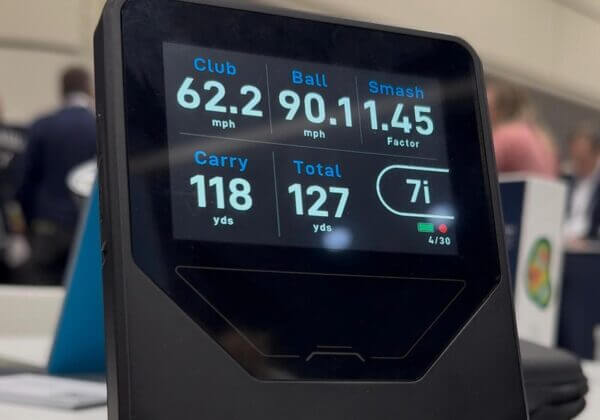
GET FIT FOR YOUR GAME WITH TRUEGOLFFIT™
Unbiased. No Guesswork. All Major Brands. Matched To Your Swing. Advanced Golf Analytics matches the perfect clubs to your exact swing using connected data and machine learning.
Prototyping to Production
You’ve likely heard shaft companies talking about concentricity, which means the shaft is designed and produced in such a manner as to perform virtually identically regardless of installation orientation. Because you can’t bake quality control into a final product or simply increase the number of QC checkpoints, consistently high-quality products are the result of consistently high-quality materials, designs, and processes.
The philosophy is that you can’t inspect quality into a product; it has to be an inherent element of every step in a production process.
Quality of Materials
Top-end shaft manufacturers work to control the environment in which pre-preg materials are stored. In the case of Fujikura, it houses all materials (USA, Japan, Vietnam, and China) in large, commercial refrigerators at a constant 40˚F, 24 hours a day, 7 days a week. By maintaining this storage protocol, the relationship between the carbon fibers and resin is preserved. Because we’re dealing with what is essentially glue or plastic, it’s vital to ensure the resin does not change state until it’s ready to be cured around a mandrel – (a heating process we will get into later).

As mentioned in Materials 101, there are several select suppliers of raw materials which contract with major shaft companies to provide the necessary materials, based on desired tolerances and specifications. Some shaft manufacturers take it several steps further by applying a series of internal quality control measures.
Material Testing
In addition to keeping materials at a constant state, Fujikura utilizes a proprietary measurement system to make sure materials received are within desired tolerances. It routinely checks the specifications of the materials (tonnage, tensile strength, modulus, elongation, density, etc.) to ensure the nominal state of the materials hasn’t changed during a shaft’s lifecycle. These specifications are logged and entered into its design program.

An example of one of these checks is material weights or what’s referred to as Fiber Areal Weights (FAW). FAW is the weight of the fiber per unit area (e.g., a standard piece of polyester might weigh 1 oz/square foot). When dealing with composites were talking in grams per meter squared (g/m2), and the tolerance for such weights is far more precise.
The mechanics of it work like this. The supplier provides a FAW of the material before shipping. Upon receipt, the FAW is recorded and logged before the material into placed into inventory and stored in the refrigerator.
While FAW is a simple measurement, there are several additional specification checks and tests run on materials before they ever make it into the kitchen, let alone a final entrée. Two brief examples are tests for fiber uniformity (ensuring all fibers are flat/parallel and contain uniform resin content) and tonnage (measured by stretching a cured sample called a coupon until it breaks).
Because consistency is paramount, Fujikura performs the same series of tests on materials received at each of its factories in Asia as well as its prototyping lab in Carlsbad, CA.
Production Process
Once materials are selected and engineers have determined specific performance characteristics, a design sheet is printed, and materials are cut to precise specifications.
What is a design sheet?
A design sheet is a part recipe, part instruction manual. Every shaft company uses some version of one just like every home builder operates based on a series of blueprints. Fujikura’s design sheets are created through a proprietary shaft design program. These design sheets provide technicians with the materials (length and quantity) and the layout (how to cut the materials and what order to apply the materials to the mandrels). It seems like a relatively straightforward process, and while producing a shaft isn’t on the same level as brain surgery, it’s not microwave popcorn easy either.

Layout & Cut
Technicians follow the design sheet and use a large CNC machine to precisely cut materials. While there are different types of materials, the ply in which materials are cut and placed is most important. It’s why exceptional cake recipes suggest equal weights of sugar and flour and roughly equal weights of eggs and butter/shortening. Trust me on this one.
As shown in the design sheet, some plies run the full length of the shaft while others are rolled in a specific location to increase or decrease stiffness. There are also different material orientations that we’ve mentioned before.

Each orientation has a specific purpose and is listed below as a refresher from Materials 101.
- 0 degree – fibers run along the length of the shaft (affects bending). Picture a hinge. The higher the stiffness of the 0-degree plies, the greater the resistance to bending during the swing.
- 90 degree – fibers run perpendicular to the length of the shaft (provides hoop strength to prevent buckling and ovalization of the cross-section).
- +/- 45 degree (referred to as Bias) – These materials lie across the 0-degree materials at +/- 45-degree angles (affects twisting). Bias plies are used to decrease/increase torque and help provide a smoother feel.
Once the design’s taper rate and parallel sections have been determined and materials have been cut into plies, it’s time to get rolling – shafts, that is.

Rolling & Mandrel
Technicians take the cut ply materials and hand roll them around a specially designed tool called a mandrel. Shaft companies often maintain a stock of mandrel designs that vary in size, shape, and contour. Having such a variety (Fujikura has hundreds) allows for each shaft to be rolled based on specific performance characteristics like weight, torque, and stiffness.

There are specific “clocking” locations labeled on the mandrel that correspond with the layout on the design sheet. These clocking locations specify when and where the materials are to be applied and serve to balance materials as they are rolled to ensure a uniform shape. This step is crucial but becomes even more so as the number of plies increases. Each additional ply increases the complexity of the process. For some shafts, the complexity of the hand-rolling is like preparing Baked Alaska, while for others, it’s more on the level of grilled cheese.
For reference, simpler designs may only use 5-7 plies, while more sophisticated and intricate designs can incorporate 20 plies in the development of a shaft.

Once the materials have been applied to the mandrel by hand, the mandrel and numerous ply materials are then placed on a rolling table which applies extreme pressure, fusing the materials around the mandrel. This is when the shaft begins to take shape.
Curing
Once the shaft is finished on the mandrel, Fujikura uses a special vacuum applied cellophane which removes air pockets and imperfections. The shaft is then cured inside the cellophane wrap in a specialized oven to ensure all of the air pockets have been forced out. More importantly, the curing process heats the resin in each of the materials (remember resin is glue), bringing the multiple layers of composites together to form one design (the shaft). After the shaft is cured, the cellophane must be removed so paint and graphics can be applied.
The shaft is then sanded, washed, and dried to remove any imperfections. With Fujikura, every shaft design includes an outermost layer of carbon fiber, referred to as a sacrificial ply that is used to protect the design’s final layer of carbon fiber, and consequently, the integrity of the overall design.
Sanding down the sacrificial ply also allows the shaft to be prepped for paint and cosmetics. Before paint application, technicians recheck specifications (OD’s, handle and tip flex, torque, weight, etc.) to ensure every shaft is within target and on spec.
Paint & Finish
Shafts that have been approved and spec verified by technicians move into the final phase of production – paint and finish.
Shaft Cosmetics Add Weight
Once a 55g shaft is designed and produced, it still needs final cosmetics and branding. It may not be something many consider, but cosmetics add weight to a shaft, and the more paint applied, the heavier the shaft gets.
In general, lightweight paints are more expensive and shaft companies that delegate this step to an outside company often end up with heavier, more generic paints.
To minimize the impact of paint weight, Fujikura co-engineered with its paint supply partner what it calls Phantium® Finish; an ultra-lightweight paint that saves 5-7 grams (roughly 10% of the weight of the 55g shaft in our example) versus conventional paints. Weight which isn’t wasted on paint/cosmetics can be reapportioned into shaft materials. The effect of each layer of paint and the decal are accounted for in the design program and used in calculating the weight of the final design.

The shaft is then painted through a squeegee system and can require multiple layers of before heat transfer graphics or silkscreen cosmetics are applied.
With graphics complete, the shaft is now ready for final quality checks. The slightest difference between the initial design and the finished product can significantly alter the performance and durability. The same specifications are once again checked against the design sheet, and each shaft is checked for any cosmetic blemishes to ensure uniformity. Every shaft manufacturer has a tolerance range for each specification. The smaller the range, the tighter the tolerance, and the more consistent the final product. Plus or minus 2-3 gr for total weight is an excellent example of a tight tolerance.
What’s Next
Ready to eat? Not yet. Before this baby is ready to be plated and served, there are still a host of checkpoints and tests a shaft has to pass before it makes it out of the factory and into the hands of golfers, which is the topic for our next Shaft U chapter, Testing 101.
As always, please post your thoughts and questions below!


Steph
6 years ago
Thanks for the interesting insights!
Looking forward to your next article about FLOing, puring and spining, and hope that you actually perform unbiased testing with those techniques. They seems to be the black box of golf….