
Over the past few weeks, we have guided you through the basic club-building methods and practices. Now, let’s pull all those pieces together and learn step-by-step how to build a golf club.
Whether clubmaking is a basement hobby with a small workbench or a full shop with all the tools, it is fun and rewarding to be able to build and repair clubs. Learning this craft can allow you to change from a steel-shafted golf club to a graphite shaft, build a new long iron or pitching wedge. The options are limitless and it all starts with the basics.
Another benefit is that you can adjust and change your golf clubs yourself as your golf game and swing change. While we won’t be going over how to adjust loft angle or lie angles (yet), we will cover the core portions of clubmaking to help you improve your skill level.
Tools and Equipment Required
- Golf heads (irons or wedges)
- Golf shafts
- Golf grips
- Ferrules
- Golf grip tape (or masking tape if using the air regripping method)
- Solvent
- Golf epoxy mix
- Rags
- Vise
- Ruler or tape measure
- Belt sander or sandpaper
Useful But Not Necessary
- Utility knife or blade for tape
- Shaft puller (in the case of reshafting golf clubs)
- Loft machine
- Lie Machine
- Drill (expanding ferrules)
- Saw (trimming shafts)
Before You Start: Need to Know
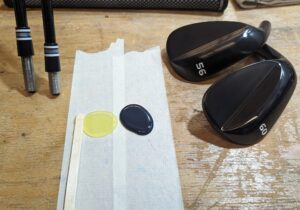
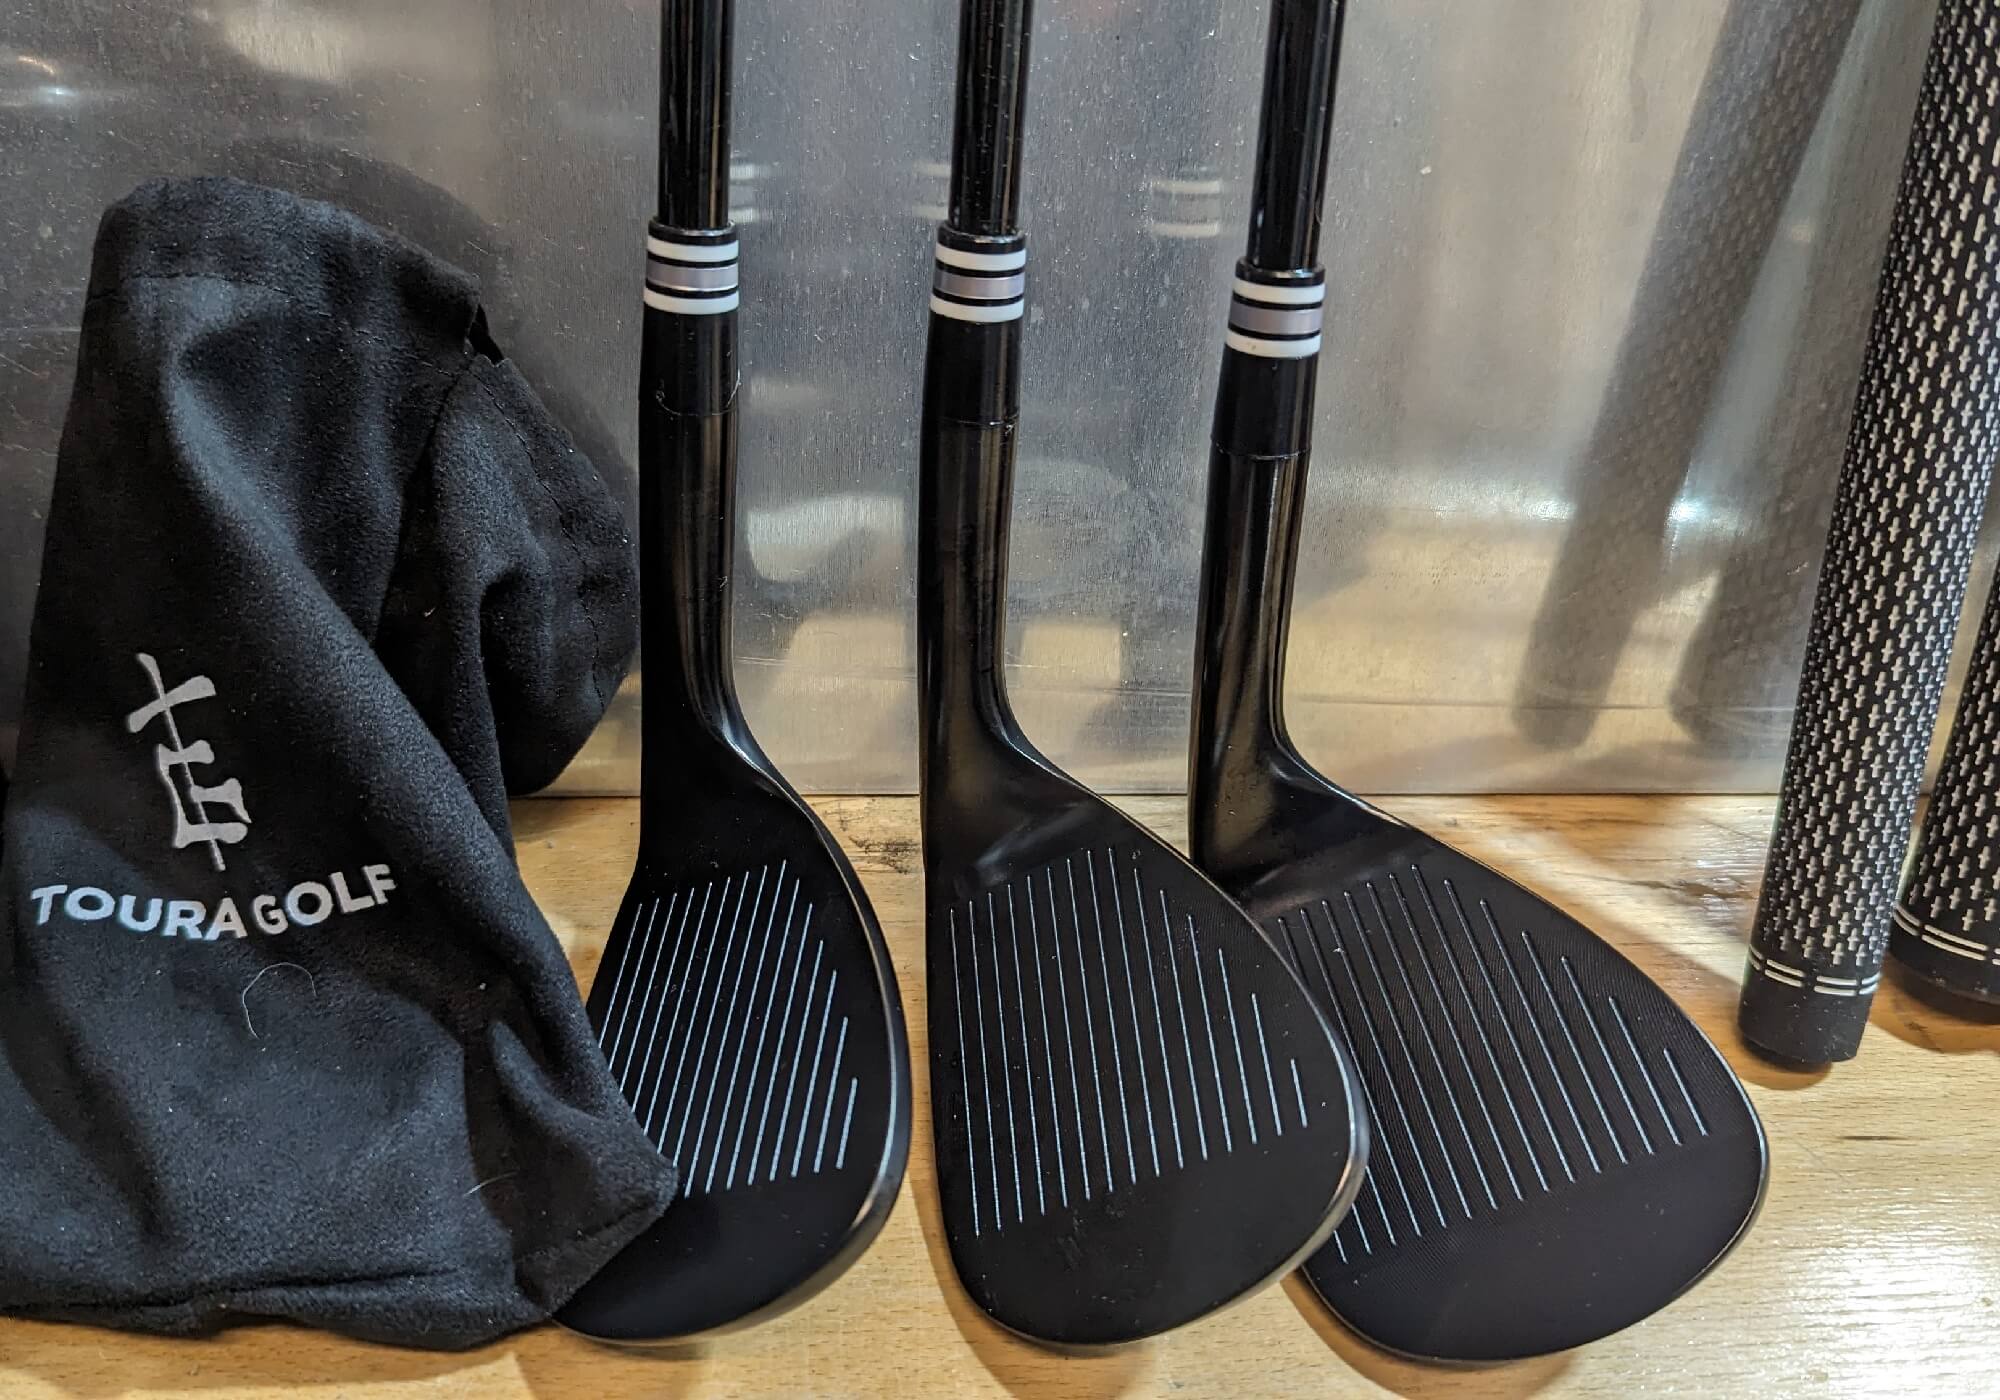
For the wedges featured in the photo, I got them as blanks with no shafts. The grips and proper ferrules were provided along with the heads. As I had several shafts already, I decided to use those rather than buy new ones. Iron and wedge shafts come in two sizes: .355 taper tip and .370 parallel tip.
Why is this important? Different shafts will work better or even won’t work for certain golf club heads. While the standard is for the most part the .355 taper tip, many companies still use a .370 parallel. Taper tip golf shafts can fit into a parallel tip head by using a brass shim to make up for the size difference. This acts as an expansion for the shaft to ensure it fits snug and properly.
What is the Difference?
Parallel tip shafts have a longer parallel section at the tip of the club which can be cut at the preferred length. Using trimming instructions, a builder can influence flex and weight to make a very customized shaft. Weights of parallel tip shafts change with the length of the golf club as there is more material in longer golf shafts. A site like Golfworks has full guides on this and is a very valuable resource for any golf club builder. Whether you are a beginner looking to build your first set of golf clubs or an experienced pro, using this as a reference point can save a lot of time and frustration.
Taper tip shafts have specific shafts for each club. Taper tip shafts also often have constant weights, meaning they are the same weight regardless if they are a 4-iron shaft or pitching wedge shaft. Some companies even offer ascending weighted shafts that decrease in weight from a pitching wedge to 4-iron. This is the opposite of a parallel tip golf shaft.
Shaft Size Influences Ferrule Size
Just as different ferrule sizes are used for many hybrids and fairways, the shaft size will influence what size of golf ferrule you should purchase. Thankfully, there are easy methods to expand the inside diameter if a smaller size is purchased.
How To Build A Golf Club Step-by-Step
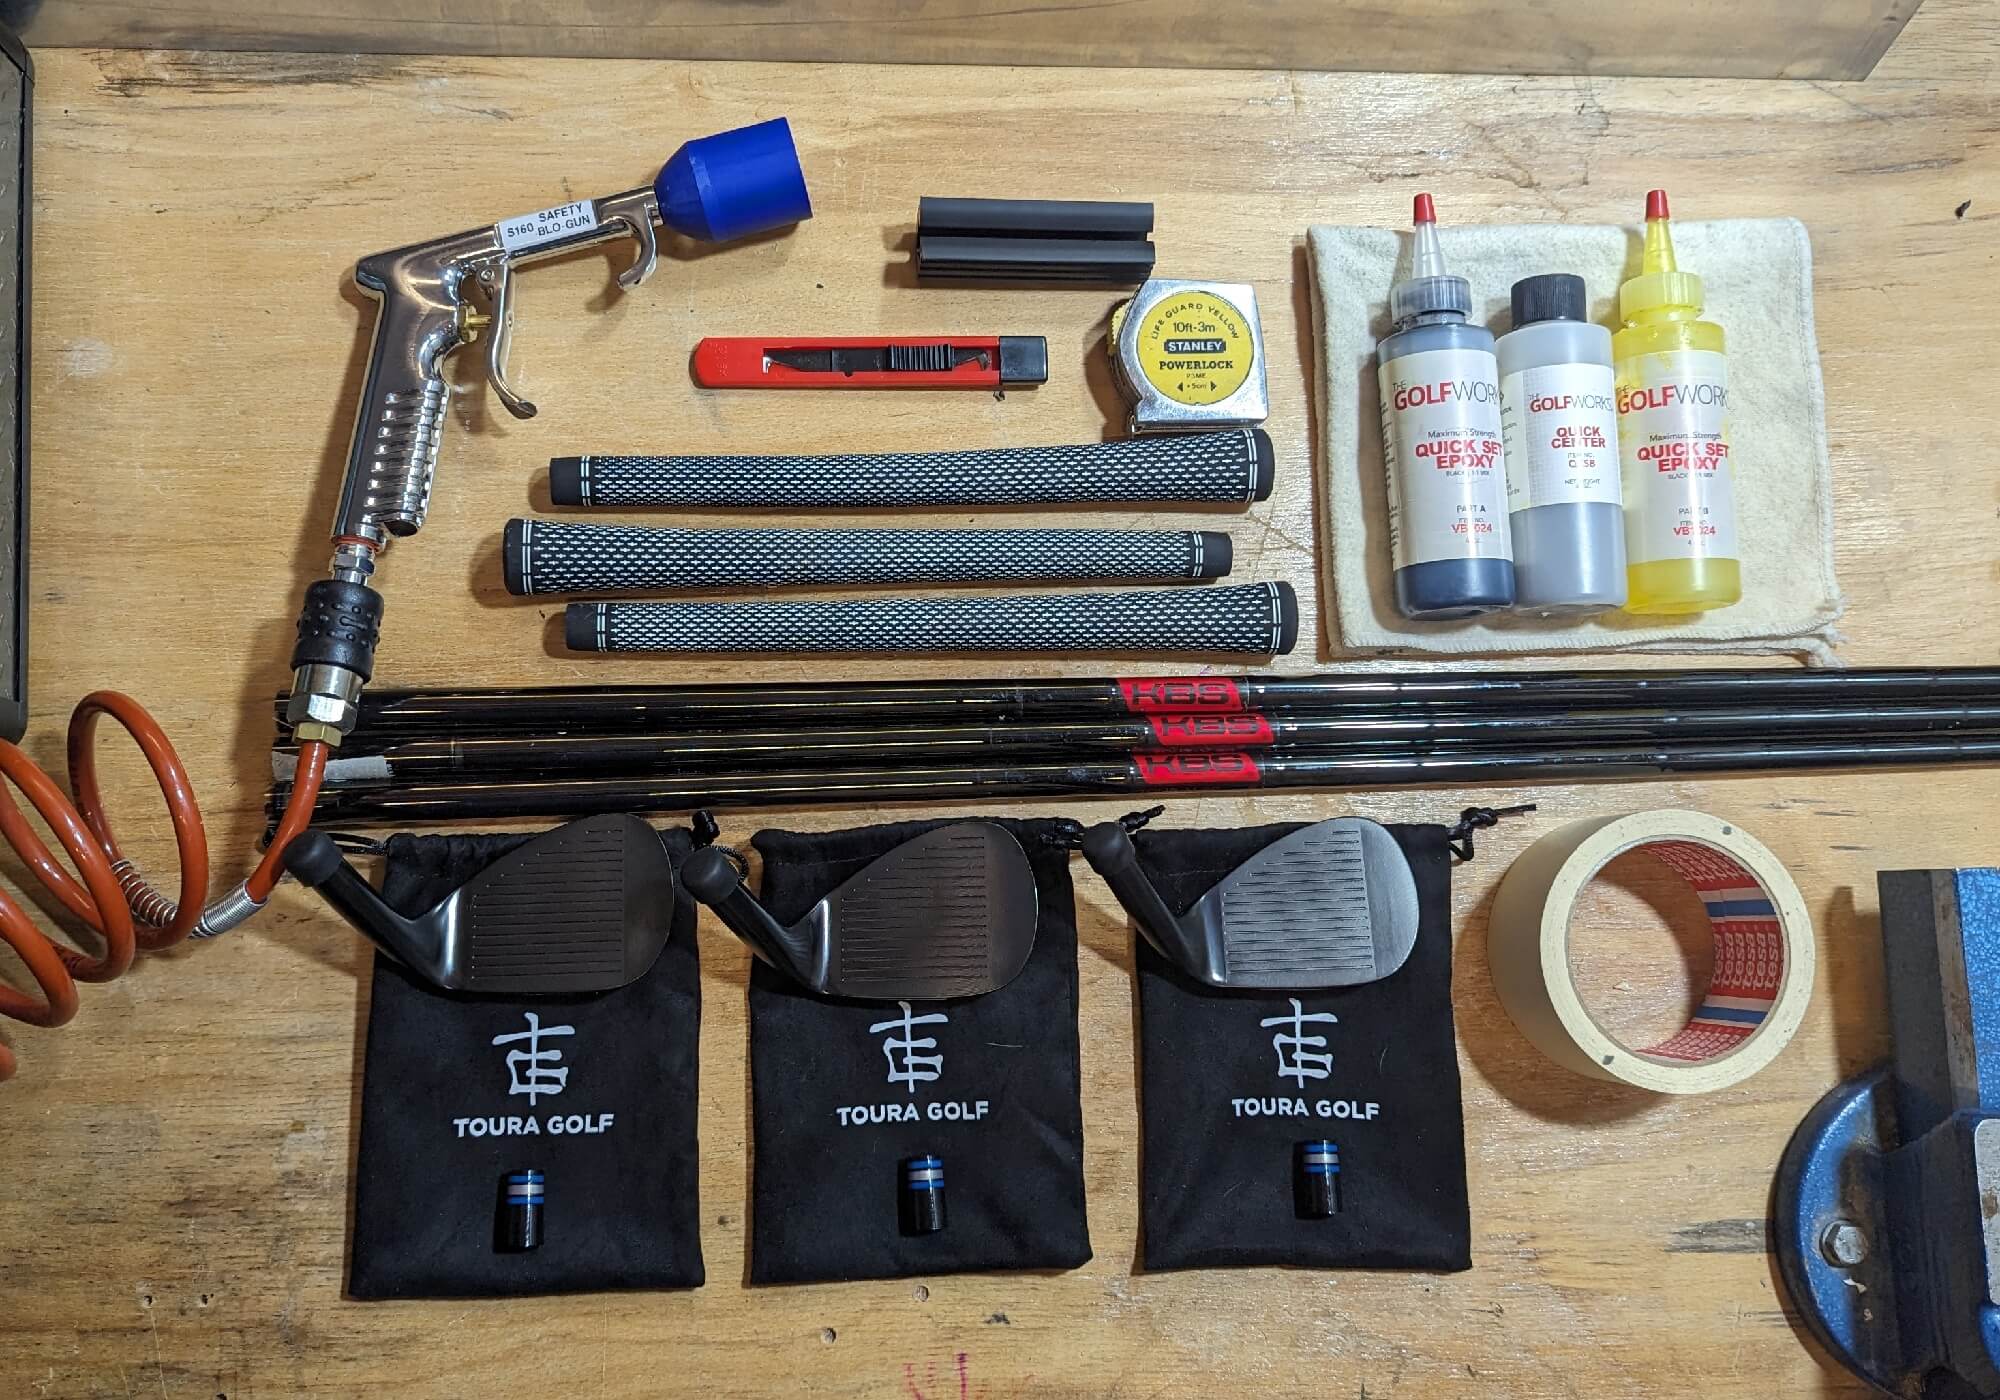
Step 1: Setup and Organize Yourself
This whole process does not have to be done in one sitting. While you can build a full iron set in one go, I often prefer to do the process in stages. Lay out the equipment needed on your workbench and ensure that all the parts required are accessible. It is critical to allow yourself the proper time to build a set of clubs and have an organized and clean work area.
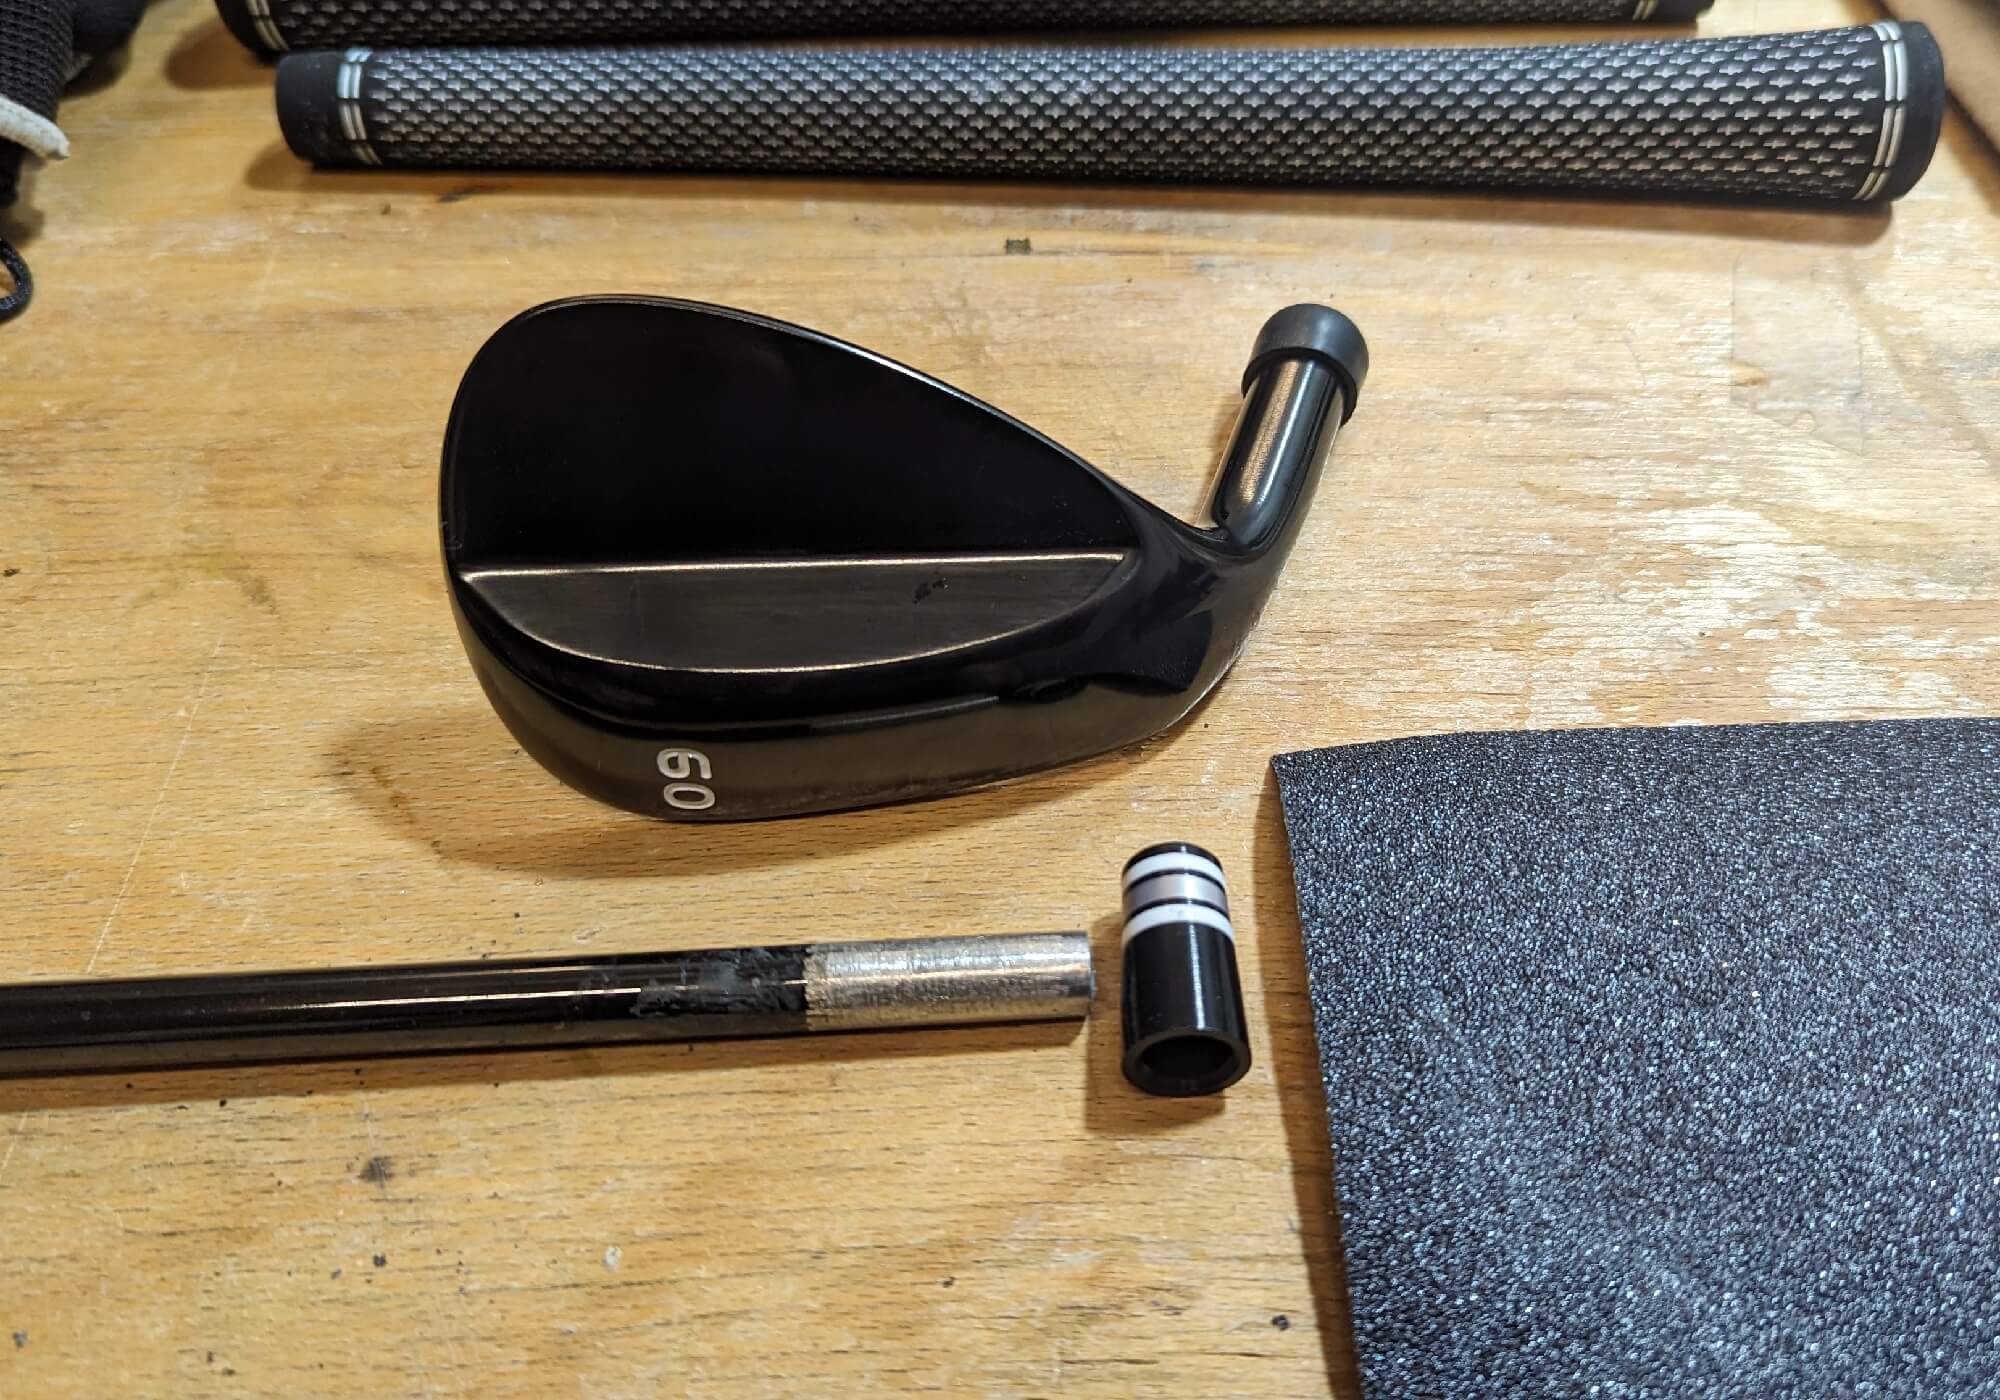
Step 2: Preparing The Golf Shafts
Prior to starting the build process, measuring all your shafts is crucial. The old adage of “measure twice, cut once” is very true. I would add that for golf shaft trimming, it would be “check three times, measure twice, cut once.” Once again, Golfworks.com is a very good resource. A general rule of thumb is that the length of irons will increase a half an inch each from PW to 4-iron.
Before getting too far into the build process, it is a good idea to start with dry builds. This means putting together the clubs without epoxy or ferrules. This allows you to know if the shaft and head fit perfectly or need more work.
Too snug? Using sandpaper or a belt grinder, remove some of the finish and paint.
Too loose? Depending on how loose, the previously mentioned brass shim will be required or some (not a lot) of centering beads will be required inside the epoxy mix.
Perfect fit? Great! Mark the shaft and head and set them aside. I normally use a bit of masking tape and a marker to designate what shaft should go with each head.
For new heads, using a golf-specific sandpaper drill bit is recommended. Scratching the inside of the hosel creates more surface area and allows for a better surface for the epoxy to adhere to.
After going through each club, set them aside and get ready for the next step.

Step 3: Ferrule Installation
With the dry fit perfect on all the golf clubs, shaft tips finished and ready, it is time for ferrule installation. Provided you have the proper size, this step is relatively simple. However, it is suggested that this be done in conjunction with the golf head installation.
Check each ferrule to see that it slides on snugly. If it is too snug, there are a few options to make it fit.
It is easier to take the golf head with the ferrule already on the shaft and push down until the shaft is fully inside the hosel and the ferrule is at the proper length on the golf shaft. When pushing down on the club head and shaft, do this as close to the neck as possible so there is no risk of bending the head or shaft.
Too snug to fit on the shaft? If the golf shaft is prepared, use a slightly larger drill bit than the inside diameter of the ferrule. Boring through will allow the ferrule to be applied with greater ease.
Alternatively, but not as efficient, is using sandpaper to wear away some of the inside. This is better for very fine expansion but larger expansion with sandpaper can lead to an uneven interior and poor alignment.

Step 4: Epoxy and Build
We mentioned this in our golf shaft adapter changing article but different epoxies have different curing times, ranging from a few minutes to 24 hours. When building a full set of irons, it is preferable to have a longer period. For five-minute epoxy, I normally make enough to do three clubs.
With the clubs dry fitted, the ferrules ready for install or already installed, it now is a straightforward process (applying ferrule as well).
- Apply a little epoxy to the inside of the ferrule and slide it onto the golf shaft.
- Apply epoxy to the shaft and a little inside the head.
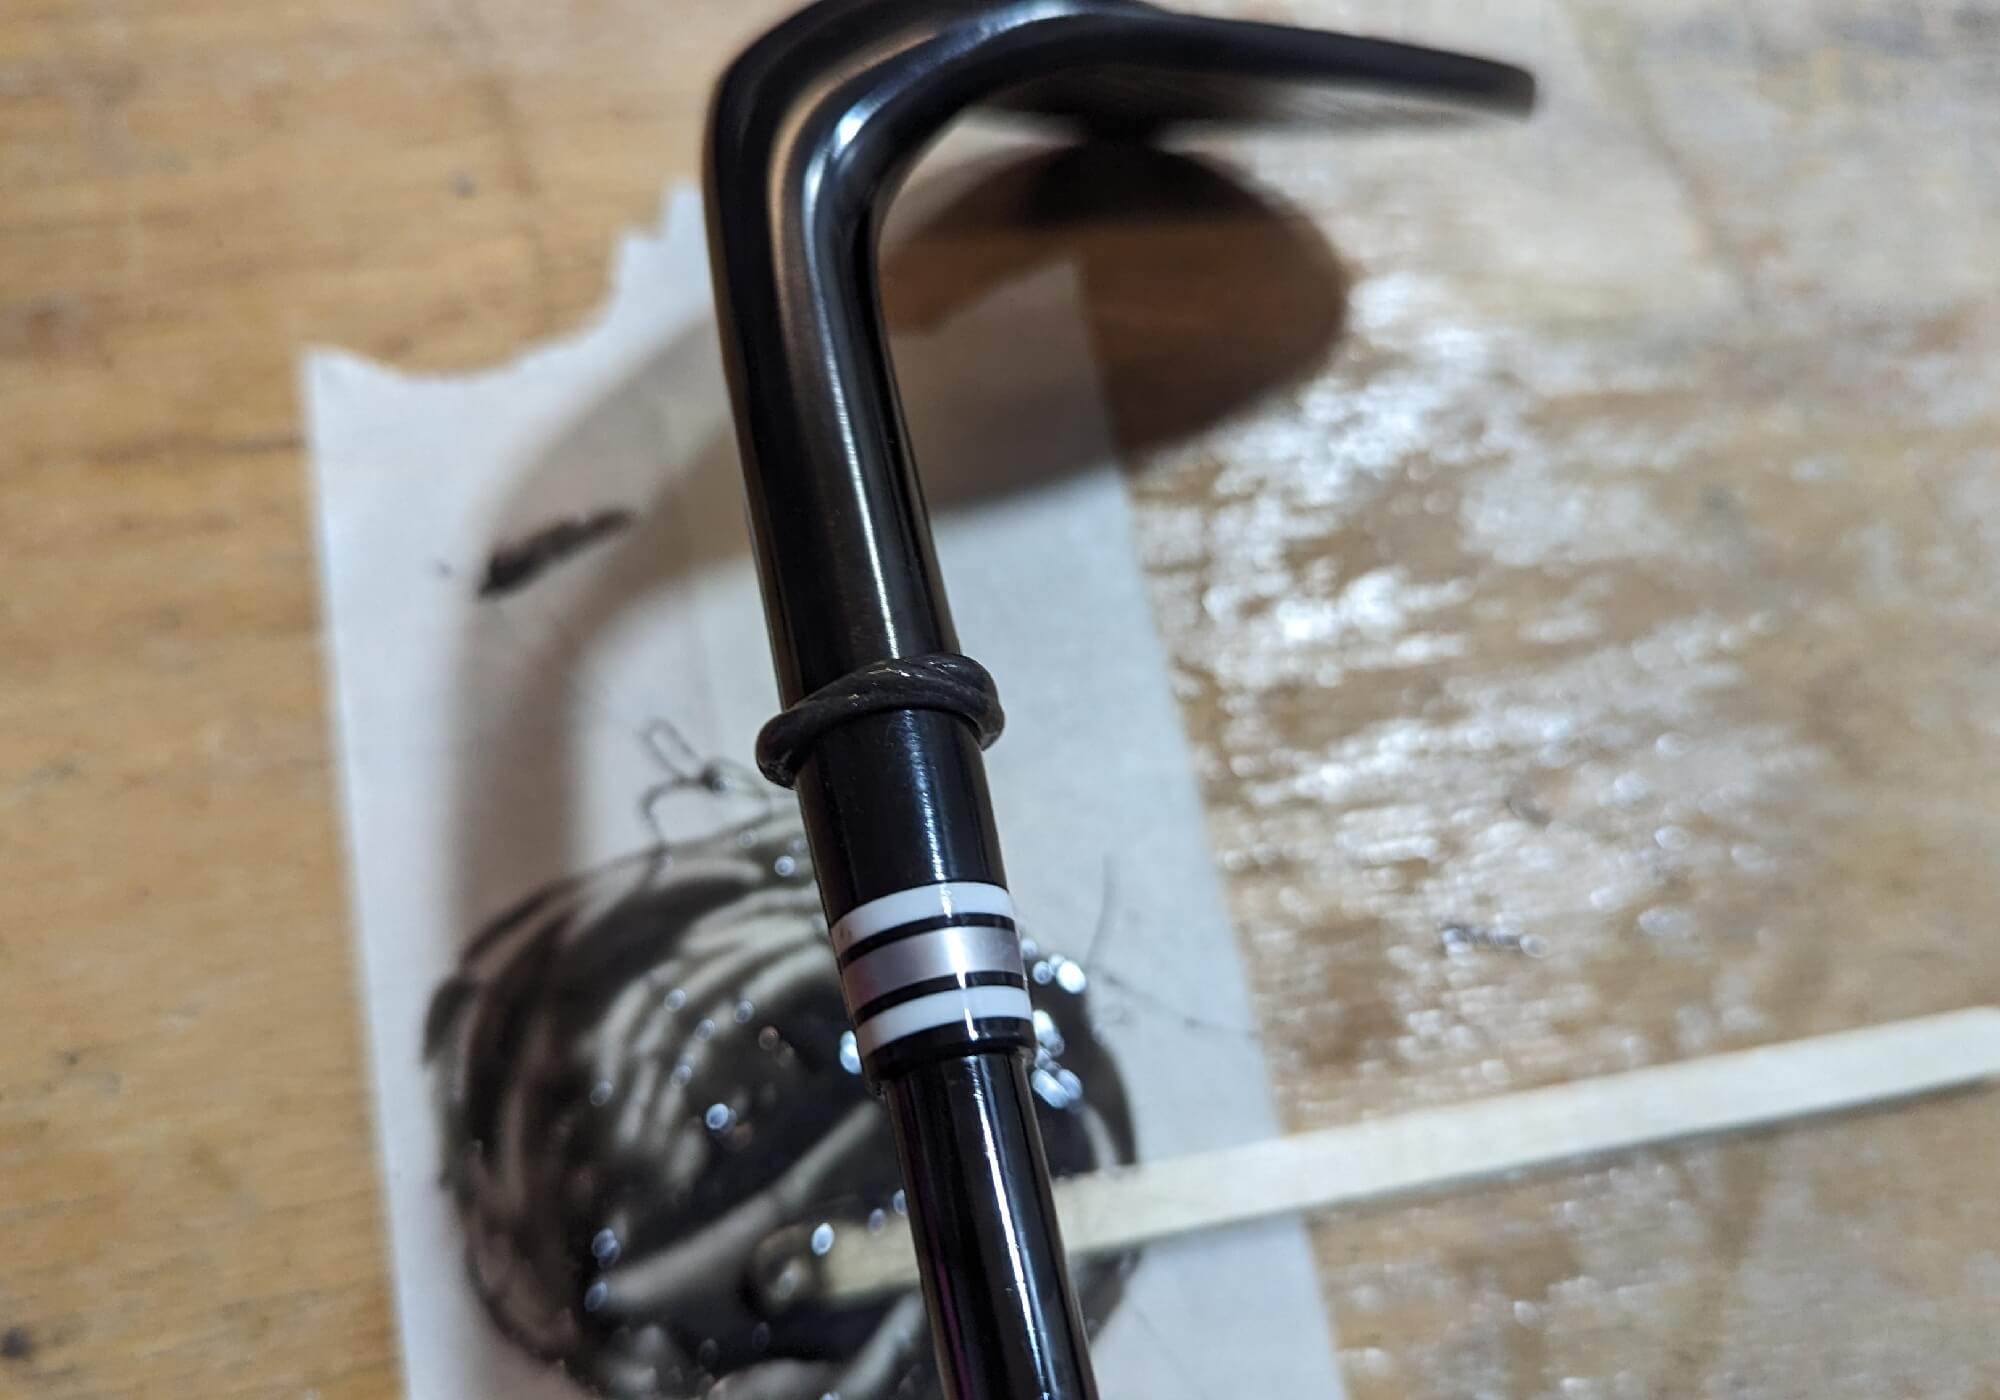
- Twirl the golf club and golf shaft together, spreading the epoxy evenly.
- Clean up any excess epoxy with a rag.
- Ensure a snug fit with no gaps between the ferrule and hosel.
The ferrule can or should protrude a little over hosel neck of the golf club. This is fine as it can be finished to have a perfect transition.
Notes:
- If you have spin-flowed shafts or prefer the label up or down on the golf shaft, take note of this and check orientation before allowing epoxy to fully set.
- Some new golf shafts will have stickers separated and uninstalled. This allows the builder to install post-build for perfect alignment.
- A wet rag can help clean off any excess epoxy. Acetone is another popular option for ferrule finishing.
Step 5: Set Time
This is pretty straightforward but allowing the clubs to set and fully dry in a warm dry area is critical. Even with quick-set epoxies, allow enough time for the full curing period before working on the clubs further.

Step 6: Grip Installation
We have covered this in two of our recent “How To” articles. However, here is a brief overview. For more details, you can find the full article links below.
- Place the golf club into the vise with the correct face orientation (this allows for better grip alignment).
- Mark shafts for tape installation with proper grip length (you don’t want excess tape hanging out the end of the grip!).
- Apply dual-sided grip tape: remove over tape and ensure there are no wrinkles in the tape. Have a slight overhang on the butt end of the club, twist and push inside the top of the shaft.
- Spray solvent onto dual-sided tape as well as inside the grip. Shake the solvent around the inside of the grip, pour excess onto the grip tape and slide the grip onto the shaft with one smooth movement.
- Use a rag to wipe off any excess solvent at both ends of the grips.
- Check alignment.
For Air Installation:
- Apply tape if required.
- Take grip and air compressor nozzle (45 psi recommended).
- Use air to expand the grip and slide onto the grip.
- Check alignment.
Wrapping Up
In summary, learning how to build a golf club is a fulfilling skill that goes beyond just creating new clubs. It allows golfers to customize and adapt their equipment as their game progresses. The step-by-step guide emphasizes precision and organization, highlighting the potential for experimentation. Whether you’re a beginner or an experienced builder, the basics outlined here, along with resources like Golfworks, provide a straightforward path to enjoy the craft of golf club building.


David J Clement
1 year ago
A fine summary of the assembly process, but…. Part of the dry fitting process is setting the proper swing weight based on your particular fitting specs. For me, this is D-2. Typically, some amount of weight will need to be added at the head end of your club assembly in order to achieve your desired swing weight. Weight is added into ports formed in the head for this purpose. Some heads have a weight port residing just under where the shaft tip comes to rest inside the hosel and others have one or more ports distributed along the bottom or back of the club head. If your heads have no weight ports at all, then you typically use weight plugs that fit up inside the shaft tip and protrude slightly down below the shaft tip. Whatever system is used, you epoxy the added weights into the club as part of epoxying the shafts.